


How To Argue Against AI-First Research
How To Argue Against AI-First Research How To Argue Against AI-First Research Vitaly Friedman 2025-03-28T09:00:00+00:00 2025-04-01T21:33:18+00:00 With AI upon us, companies have recently been turning their attention to “synthetic” user testing — AI-driven research that replaces UX research. There, questions are answered by AI-generated “customers,” […]
Ux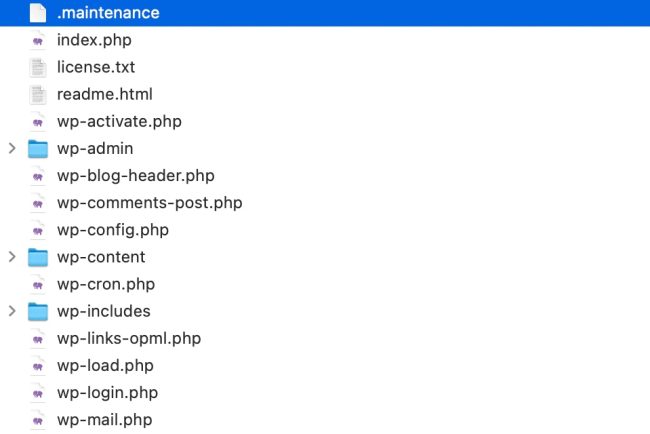
How to Put Your WordPress Site in Maintenance Mode
There are times when you need to temporarily take your WordPress site offline, whether for updates, troubleshooting, or redesigns. Instead of displaying a broken or unfinished site, maintenance mode allows you to show visitors a professional message while you work behind the scenes. Unlike a […]
Wordpress How To Build Confidence In Your UX Work
How To Build Confidence In Your UX Work How To Build Confidence In Your UX Work Vitaly Friedman 2025-03-11T15:00:00+00:00 2025-03-11T22:04:08+00:00 When I start any UX project, typically, there is very little confidence in the successful outcome of my UX initiatives. In fact, there is quite […]
Ux


How To Argue Against AI-First Research
How To Argue Against AI-First Research How To Argue Against AI-First Research Vitaly Friedman 2025-03-28T09:00:00+00:00 2025-04-01T21:33:18+00:00 With AI upon us, companies have recently been turning their attention to “synthetic” user testing — AI-driven research that replaces UX research. There, questions are answered by AI-generated “customers,” […]
Ux
How To Argue Against AI-First Research
Vitaly Friedman 2025-03-28T09:00:00+00:00
2025-04-01T21:33:18+00:00
With AI upon us, companies have recently been turning their attention to “synthetic” user testing — AI-driven research that replaces UX research. There, questions are answered by AI-generated “customers,” human tasks “performed” by AI agents.
However, it’s not just for desk research or discovery that AI is used for; it’s an actual usability testing with “AI personas” that mimic human behavior of actual customers within the actual product. It’s like UX research, just… well, without the users.
.course-intro{–shadow-color:206deg 31% 60%;background-color:#eaf6ff;border:1px solid #ecf4ff;box-shadow:0 .5px .6px hsl(var(–shadow-color) / .36),0 1.7px 1.9px -.8px hsl(var(–shadow-color) / .36),0 4.2px 4.7px -1.7px hsl(var(–shadow-color) / .36),.1px 10.3px 11.6px -2.5px hsl(var(–shadow-color) / .36);border-radius:11px;padding:1.35rem 1.65rem}@media (prefers-color-scheme:dark){.course-intro{–shadow-color:199deg 63% 6%;border-color:var(–block-separator-color,#244654);background-color:var(–accent-box-color,#19313c)}}

If this sounds worrying, confusing, and outlandish, it is — but this doesn’t stop companies from adopting AI “research” to drive business decisions. Although, unsurprisingly, the undertaking can be dangerous, risky, and expensive and usually diminishes user value.
This article is part of our ongoing series on UX. You can find more details on design patterns and UX strategy in Smart Interface Design Patterns 🍣 — with live UX training coming up soon. Free preview.
Fast, Cheap, Easy… And Imaginary
Erika Hall famously noted that “design is only as ‘human-centered’ as the business model allows.” If a company is heavily driven by hunches, assumptions, and strong opinions, there will be little to no interest in properly-done UX research in the first place.

But unlike UX research, AI research (conveniently called synthetic testing) is fast, cheap, and easy to re-run. It doesn’t raise uncomfortable questions, and it doesn’t flag wrong assumptions. It doesn’t require user recruitment, much time, or long-winded debates.
And: it can manage thousands of AI personas at once. By studying AI-generated output, we can discover common journeys, navigation patterns, and common expectations. We can anticipate how people behave and what they would do.
Well, that’s the big promise. And that’s where we start running into big problems.
LLMs Are People Pleasers
Good UX research has roots in what actually happened, not what might have happened or what might happen in the future.
By nature, LLMs are trained to provide the most “plausible” or most likely output based on patterns captured in its training data. These patterns, however, emerge from expected behaviors by statistically “average” profiles extracted from content on the web. But these people don’t exist, they never have.
By default, user segments are not scoped and not curated. They don’t represent the customer base of any product. So to be useful, we must eloquently prompt AI by explaining who users are, what they do, and how they behave. Otherwise, the output won’t match user needs and won’t apply to our users.
When “producing” user insights, LLMs can’t generate unexpected things beyond what we’re already asking about.
In comparison, researchers are only able to define what’s relevant as the process unfolds. In actual user testing, insights can help shift priorities or radically reimagine the problem we’re trying to solve, as well as potential business outcomes.
Real insights come from unexpected behavior, from reading behavioral clues and emotions, from observing a person doing the opposite of what they said. We can’t replicate it with LLMs.
AI User Research Isn’t “Better Than Nothing”
Pavel Samsonov articulates that things that sound like customers might say them are worthless. But things that customers actually have said, done, or experienced carry inherent value (although they could be exaggerated). We just need to interpret them correctly.
AI user research isn’t “better than nothing” or “more effective.” It creates an illusion of customer experiences that never happened and are at best good guesses but at worst misleading and non-applicable. Relying on AI-generated “insights” alone isn’t much different than reading tea leaves.
The Cost Of Mechanical Decisions
We often hear about the breakthrough of automation and knowledge generation with AI. Yet we often forget that automation often comes at a cost: the cost of mechanical decisions that are typically indiscriminate, favor uniformity, and erode quality.
As Maria Rosala and Kate Moran write, the problem with AI research is that it most certainly will be misrepresentative, and without real research, you won’t catch and correct those inaccuracies. Making decisions without talking to real customers is dangerous, harmful, and expensive.
Beyond that, synthetic testing assumes that people fit in well-defined boxes, which is rarely true. Human behavior is shaped by our experiences, situations, habits that can’t be replicated by text generation alone. AI strengthens biases, supports hunches, and amplifies stereotypes.
Triangulate Insights Instead Of Verifying Them
Of course AI can provide useful starting points to explore early in the process. But inherently it also invites false impressions and unverified conclusions — presented with an incredible level of confidence and certainty.
Starting with human research conducted with real customers using a real product is just much more reliable. After doing so, we can still apply AI to see if we perhaps missed something critical in user interviews. AI can enhance but not replace UX research.
Also, when we do use AI for desk research, it can be tempting to try to “validate” AI “insights” with actual user testing. However, once we plant a seed of insight in our head, it’s easy to recognize its signs everywhere — even if it really isn’t there.
Instead, we study actual customers, then triangulate data: track clusters or most heavily trafficked parts of the product. It might be that analytics and AI desk research confirm your hypothesis. That would give you a much stronger standing to move forward in the process.
Wrapping Up
I might sound like a broken record, but I keep wondering why we feel the urgency to replace UX work with automated AI tools. Good design requires a good amount of critical thinking, observation, and planning.
To me personally, cleaning up after AI-generated output takes way more time than doing the actual work. There is an incredible value in talking to people who actually use your product.
I would always choose one day with a real customer instead of one hour with 1,000 synthetic users pretending to be humans.
Useful Resources
- Synthetic Users, by Maria Rosala, Kate Moran
- Synthetic Users: The Next Revolution in UX Research?, by Carolina Guimarães
- AI Users Are Neither AI Nor Users, by Debbie Levitt
- Planning Research with Generative AI, by Maria Rosala
- Synthetic Testing, by Stéphanie Walter, Nikki Anderson, MA
- The Dark Side of Synthetic AI Research, by Greg Nudelman
New: How To Measure UX And Design Impact
Meet Measure UX & Design Impact (8h), a new practical guide for designers and UX leads to measure and show your UX impact on business. Use the code 🎟 IMPACT to save 20% off today. Jump to the details.

Video + UX Training
$ 495.00 $ 799.00
Get Video + UX Training
25 video lessons (8h) + Live UX Training.
100 days money-back-guarantee.
Video only
$ 250.00$ 395.00
25 video lessons (8h). Updated yearly.
Also available as a UX Bundle with 2 video courses.
(cm)
How to Put Your WordPress Site in Maintenance Mode
There are times when you need to temporarily take your WordPress site offline, whether for updates, troubleshooting, or redesigns. Instead of displaying a broken or unfinished site, maintenance mode allows you to show visitors a professional message while you work behind the scenes. Unlike a […]
WordpressThere are times when you need to temporarily take your WordPress site offline, whether for updates, troubleshooting, or redesigns. Instead of displaying a broken or unfinished site, maintenance mode allows you to show visitors a professional message while you work behind the scenes.
Unlike a regular page, a maintenance page uses the 503 standard HTTP status code, which tells search engines the downtime is temporary and prevents SEO penalties.
In this article, we’ll walk you through a couple of different ways to implement this maintenance page. Let’s check it out.
Use Built-in Maintenance File
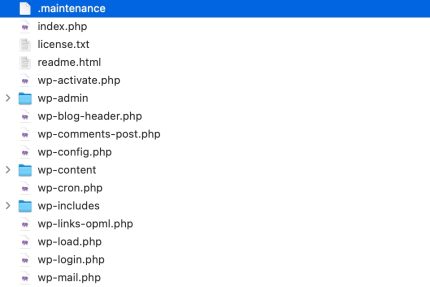
WordPress has a built-in maintenance mode that activates when you update your site. It creates a .maintenance file in the root directory of your site. This file contains the message you want to show visitors and the time the maintenance mode was activated. Likewise, you could create a .maintenance file manually to put your site in maintenance mode.
You can create the file, .maintenance, at the root of your WordPress site installation where the wp-config.php file resides, as you can see below:

Then put this code below within the file:
<?php $upgrading = time(); ?>
This will immediately activate WordPress maintenance mode. If you call the built-in wp_is_maintenance_mode function, it should return true, confirming that maintenance mode is active. When you reload the page, WordPress will display the default maintenance message.

Customizing the Maintenance Page
The default maintenance message is simple and plain.
You can customize it by creating a custom maintenance page named maintenance.php within the wp-content directory. You can add a custom message and styles to the page to make it more appealing to visitors or make it fit better with your overall site design.
Here is an example code you can put within the file:
<!doctype html>
<html>
<head>
    <meta charset="utf-8">
    <title>Maintenance</title>
    <link rel="stylesheet" href="https://cdnjs.cloudflare.com/ajax/libs/normalize/8.0.1/normalize.min.css">
    <style>
    #container {
        display: flex;
        width: 100vw;
        height: 100vh;
        padding-inline: 20vw;
        box-sizing: border-box;
        text-align: center;
        justify-content: center;
        align-items: center;
        flex-flow: column wrap;
    }
    </style>
</head>
<body>
    <div id="container">
        <h1>Maintenance</h1>
        <p>Our website is currently undergoing scheduled maintenance. We should be back shortly. Thank you for your patience.</p>
    </div>
</body>
</html>
Now, when you reload your site, you should see the entire page rendered with the updated content and styles from this maintenance.php file.
The problem with this file is that you cannot use WordPress functions such as wp_head, wp_title, wp_footer, esc_html_e, etc. This means that you cannot display the site title, enqueue assets like stylesheets and JavaScript files, or any other dynamic content rendered using WordPress functions within this file.
That’s why, as you can see above, we’ve only added static content and linked stylesheets statically as well.
This leads to additional problems, such as the inability to translate content on the maintenance page. And since stylesheets can’t be dynamically enqueued, the maintenance page design may feel out of place if you change your theme.
Use a Plugin
The easiest way to enable maintenance mode on your WordPress site is by using a plugin. There are several options available, but in this article, we’ll use Feature Flipper. This plugin includes various utilities, one of which allows you to activate maintenance mode easily.
After installing and activating the plugin, navigate to Settings > Features > Site and enable the “Maintenance” option. As we can see below, you can also customize the maintenance page content to match your needs.
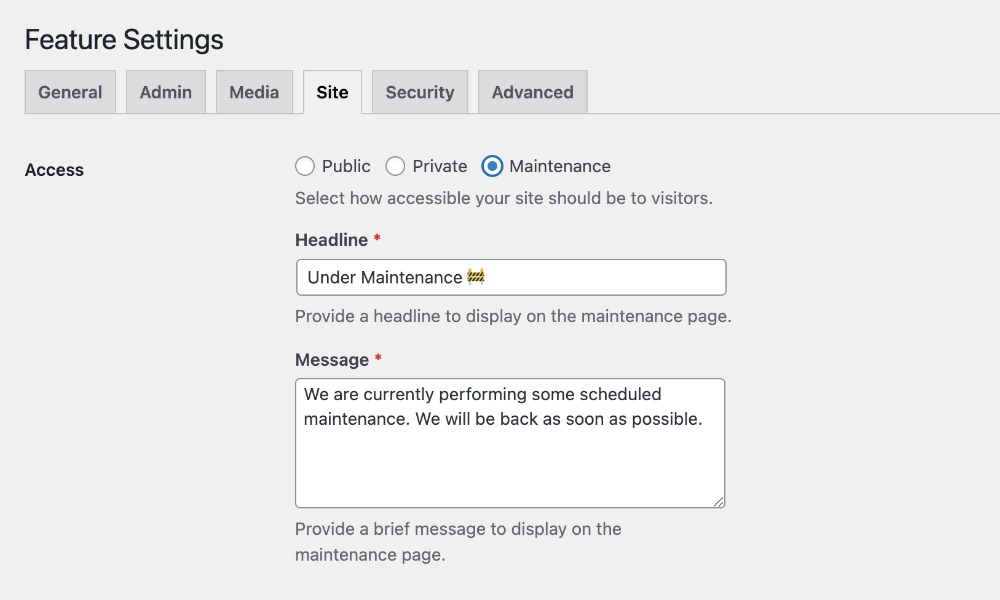
The maintenance page automatically inherits styles from your active theme to ensure that the page seamlessly matches your theme’s styles. If you change your theme, the maintenance page will adapt to the new styles accordingly.
Here’s how it looks with some of the popular themes from the WordPress.org repository:
TwentyTwentyFive
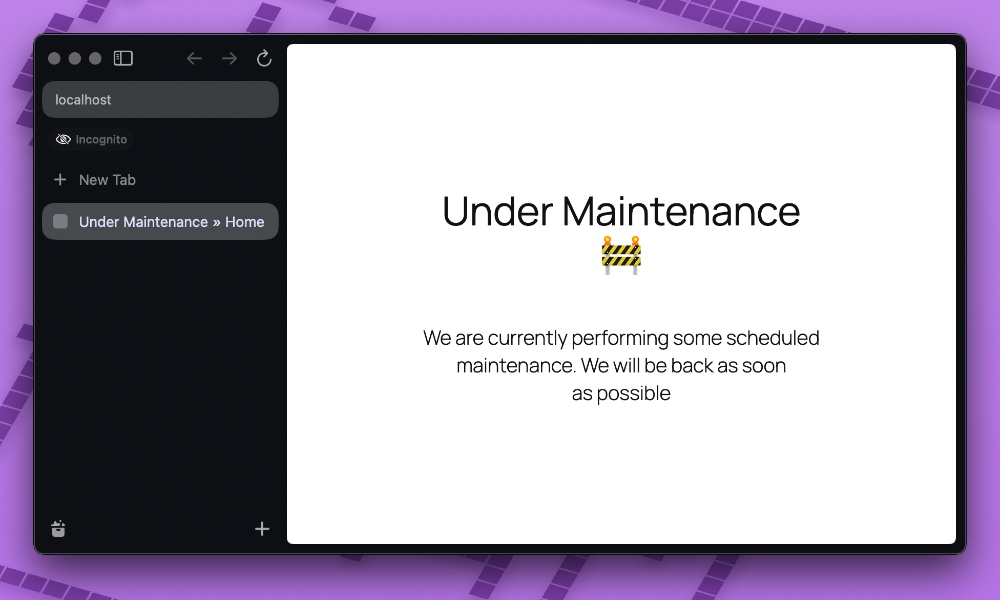
TwentyTwentyFour

TwentyTwentyOne

Wrapping Up
In this article, we explored two ways to enable maintenance mode on your WordPress site. The built-in method is quick and easy but lacks customization. Meanwhile, a plugin offers more flexibility and makes it easy to toggle maintenance mode on and off directly from the dashboard.
No matter which method you choose, don’t forget to disable maintenance mode once you’re done so your site remains accessible!
The post How to Put Your WordPress Site in Maintenance Mode appeared first on Hongkiat.
How To Build Confidence In Your UX Work
How To Build Confidence In Your UX Work How To Build Confidence In Your UX Work Vitaly Friedman 2025-03-11T15:00:00+00:00 2025-03-11T22:04:08+00:00 When I start any UX project, typically, there is very little confidence in the successful outcome of my UX initiatives. In fact, there is quite […]
Ux
How To Build Confidence In Your UX Work
Vitaly Friedman 2025-03-11T15:00:00+00:00
2025-03-11T22:04:08+00:00
When I start any UX project, typically, there is very little confidence in the successful outcome of my UX initiatives. In fact, there is quite a lot of reluctance and hesitation, especially from teams that have been burnt by empty promises and poor delivery in the past.
Good UX has a huge impact on business. But often, we need to build up confidence in our upcoming UX projects. For me, an effective way to do that is to address critical bottlenecks and uncover hidden deficiencies — the ones that affect the people I’ll be working with.
Let’s take a closer look at what this can look like.
.course-intro{–shadow-color:206deg 31% 60%;background-color:#eaf6ff;border:1px solid #ecf4ff;box-shadow:0 .5px .6px hsl(var(–shadow-color) / .36),0 1.7px 1.9px -.8px hsl(var(–shadow-color) / .36),0 4.2px 4.7px -1.7px hsl(var(–shadow-color) / .36),.1px 10.3px 11.6px -2.5px hsl(var(–shadow-color) / .36);border-radius:11px;padding:1.35rem 1.65rem}@media (prefers-color-scheme:dark){.course-intro{–shadow-color:199deg 63% 6%;border-color:var(–block-separator-color,#244654);background-color:var(–accent-box-color,#19313c)}}
This article is part of our ongoing series on UX. You can find more details on design patterns and UX strategy in Smart Interface Design Patterns 🍣 — with live UX training coming up soon. Free preview.
UX Doesn’t Disrupt, It Solves Problems
Bottlenecks are usually the most disruptive part of any company. Almost every team, every unit, and every department has one. It’s often well-known by employees as they complain about it, but it rarely finds its way to senior management as they are detached from daily operations.

The bottleneck can be the only senior developer on the team, a broken legacy tool, or a confusing flow that throws errors left and right — there’s always a bottleneck, and it’s usually the reason for long waiting times, delayed delivery, and cutting corners in all the wrong places.
We might not be able to fix the bottleneck. But for a smooth flow of work, we need to ensure that non-constraint resources don’t produce more than the constraint can handle. All processes and initiatives must be aligned to support and maximize the efficiency of the constraint.
So before doing any UX work, look out for things that slow down the organization. Show that it’s not UX work that disrupts work, but it’s internal disruptions that UX can help with. And once you’ve delivered even a tiny bit of value, you might be surprised how quickly people will want to see more of what you have in store for them.
The Work Is Never Just “The Work”
Meetings, reviews, experimentation, pitching, deployment, support, updates, fixes — unplanned work blocks other work from being completed. Exposing the root causes of unplanned work and finding critical bottlenecks that slow down delivery is not only the first step we need to take when we want to improve existing workflows, but it is also a good starting point for showing the value of UX.

To learn more about the points that create friction in people’s day-to-day work, set up 1:1s with the team and ask them what slows them down. Find a problem that affects everyone. Perhaps too much work in progress results in late delivery and low quality? Or lengthy meetings stealing precious time?
One frequently overlooked detail is that we can’t manage work that is invisible. That’s why it is so important that we visualize the work first. Once we know the bottleneck, we can suggest ways to improve it. It could be to introduce 20% idle times if the workload is too high, for example, or to make meetings slightly shorter to make room for other work.
The Theory Of Constraints
The idea that the work is never just “the work” is deeply connected to the Theory of Constraints discovered by Dr. Eliyahu M. Goldratt. It showed that any improvements made anywhere beside the bottleneck are an illusion.
Any improvement after the bottleneck is useless because it will always remain starved, waiting for work from the bottleneck. And any improvements made before the bottleneck result in more work piling up at the bottleneck.

Wait Time = Busy ÷ Idle
To improve flow, sometimes we need to freeze the work and bring focus to one single project. Just as important as throttling the release of work is managing the handoffs. The wait time for a given resource is the percentage of time that the resource is busy divided by the percentage of time it’s idle. If a resource is 50% utilized, the wait time is 50/50, or 1 unit.
If the resource is 90% utilized, the wait time is 90/10, or 9 times longer. And if it’s 99% of time utilized, it’s 99/1, so 99 times longer than if that resource is 50% utilized. The critical part is to make wait times visible so you know when your work spends days sitting in someone’s queue.
The exact times don’t matter, but if a resource is busy 99% of the time, the wait time will explode.
Avoid 100% Occupation
Our goal is to maximize flow: that means exploiting the constraint but creating idle times for non-constraint to optimize system performance.
One surprising finding for me was that any attempt to maximize the utilization of all resources — 100% occupation across all departments — can actually be counterproductive. As Goldratt noted, “An hour lost at a bottleneck is an hour out of the entire system. An hour saved at a non-bottleneck is worthless.”
Recommended Read: “The Phoenix Project”

I can only wholeheartedly recommend The Phoenix Project, an absolutely incredible book that goes into all the fine details of the Theory of Constraints described above.
It’s not a design book but a great book for designers who want to be more strategic about their work. It’s a delightful and very real read about the struggles of shipping (albeit on a more technical side).
Wrapping Up
People don’t like sudden changes and uncertainty, and UX work often disrupts their usual ways of working. Unsurprisingly, most people tend to block it by default. So before we introduce big changes, we need to get their support for our UX initiatives.
We need to build confidence and show them the value that UX work can have — for their day-to-day work. To achieve that, we can work together with them. Listening to the pain points they encounter in their workflows, to the things that slow them down.
Once we’ve uncovered internal disruptions, we can tackle these critical bottlenecks and suggest steps to make existing workflows more efficient. That’s the foundation to gaining their trust and showing them that UX work doesn’t disrupt but that it’s here to solve problems.
New: How To Measure UX And Design Impact
Meet Measure UX & Design Impact (8h), a practical guide for designers and UX leads to measure and show your UX impact on business. Watch the free preview or jump to the details.
Video + UX Training
$ 495.00 $ 799.00
Get Video + UX Training
25 video lessons (8h) + Live UX Training.
100 days money-back-guarantee.
Video only
$ 250.00$ 395.00
25 video lessons (8h). Updated yearly.
Also available as a UX Bundle with 2 video courses.
(cm)

The Human Element: Using Research And Psychology To Elevate Data Storytelling
The Human Element: Using Research And Psychology To Elevate Data Storytelling The Human Element: Using Research And Psychology To Elevate Data Storytelling Victor Yocco & Angelica Lo Duca 2025-02-26T10:00:00+00:00 2025-03-04T21:34:45+00:00 Data storytelling is a powerful communication tool that combines data analysis with narrative techniques to […]
Ux
The Human Element: Using Research And Psychology To Elevate Data Storytelling
Victor Yocco & Angelica Lo Duca 2025-02-26T10:00:00+00:00
2025-03-04T21:34:45+00:00
Data storytelling is a powerful communication tool that combines data analysis with narrative techniques to create impactful stories. It goes beyond presenting raw numbers by transforming complex data into meaningful insights that can drive decisions, influence behavior, and spark action.
When done right, data storytelling simplifies complex information, engages the audience, and compels them to act. Effective data storytelling allows UX professionals to effectively communicate the “why” behind their design choices, advocate for user-centered improvements, and ultimately create more impactful and persuasive presentations. This translates to stronger buy-in for research initiatives, increased alignment across teams, and, ultimately, products and experiences that truly meet user needs.
For instance, The New York Times’ Snow Fall data story (Figure 1) used data to immerse readers in the tale of a deadly avalanche through interactive visuals and text, while The Guardian’s The Counted (Figure 2) powerfully illustrated police violence in the U.S. by humanizing data through storytelling. These examples show that effective data storytelling can leave lasting impressions, prompting readers to think differently, act, or make informed decisions.


The importance of data storytelling lies in its ability to:
- Simplify complexity
It makes data understandable and actionable. - Engage and persuade
Emotional and cognitive engagement ensures audiences not only understand but also feel compelled to act. - Bridge gaps
Data storytelling connects the dots between information and human experience, making the data relevant and relatable.
While there are numerous models of data storytelling, here are a few high-level areas of focus UX practitioners should have a grasp on:
Narrative Structures: Traditional storytelling models like the hero’s journey (Vogler, 1992) or the Freytag pyramid (Figure 3) provide a backbone for structuring data stories. These models help create a beginning, rising action, climax, falling action, and resolution, keeping the audience engaged.

Data Visualization: Broadly speaking, these are the tools and techniques for visualizing data in our stories. Interactive charts, maps, and infographics (Cairo, 2016) transform raw data into digestible visuals, making complex information easier to understand and remember.
Narrative Structures For Data
Moving beyond these basic structures, let’s explore how more sophisticated narrative techniques can enhance the impact of data stories:
- The Three-Act Structure
This approach divides the data story into setup, confrontation, and resolution. It helps build context, present the problem or insight, and offer a solution or conclusion (Few, 2005). - The Hero’s Journey (Data Edition)
We can frame a data set as a problem that needs a hero to overcome. In this case, the hero is often the audience or the decision-maker who needs to use the data to solve a problem. The data itself becomes the journey, revealing challenges, insights, and, ultimately, a path to resolution.
Example:
Presenting data on declining user engagement could follow the hero’s journey. The “call to adventure” is the declining engagement. The “challenges” are revealed through data points showing where users are dropping off. The “insights” are uncovered through further analysis, revealing the root causes. The “resolution” is the proposed solution, supported by data, that the audience (the hero) can implement.
Problems With Widely Used Data Storytelling Models
Many data storytelling models follow a traditional, linear structure: data selection, audience tailoring, storyboarding with visuals, and a call to action. While these models aim to make data more accessible, they often fail to engage the audience on a deeper level, leading to missed opportunities. This happens because they prioritize the presentation of data over the experience of the audience, neglecting how different individuals perceive and process information.

While existing data storytelling models adhere to a structured and technically correct approach to data creation, they often fall short of fully analyzing and understanding their audience. This gap weakens their overall effectiveness and impact.
- Cognitive Overload
Presenting too much data without context or a clear narrative overwhelms the audience. Instead of enlightenment, they experience confusion and disengagement. It’s like trying to drink from a firehose; the sheer volume becomes counterproductive. This overload can be particularly challenging for individuals with cognitive differences who may require information to be presented in smaller, more digestible chunks. - Emotional Disconnect
Data-heavy presentations often fail to establish an emotional connection, which is crucial for driving audience engagement and action. People are more likely to remember and act upon information that resonates with their feelings and values. - Lack of Personalization
Many data stories adopt a one-size-fits-all approach. Without tailoring the narrative to specific audience segments, the impact is diluted. A message that resonates with a CEO might not land with frontline employees. - Over-Reliance on Visuals
While visuals are essential for simplifying data, they are insufficient without a cohesive narrative to provide context and meaning, and they may not be accessible to all audience members.
These shortcomings reveal a critical flaw: while current models successfully follow a structured data creation process, they often neglect the deeper, audience-centered analysis required for actual storytelling effectiveness. To bridge this gap,
Data storytelling must evolve beyond simply presenting information — it should prioritize audience understanding, engagement, and accessibility at every stage.
“
Improving On Traditional Models
Traditional models can be improved by focusing more on the following two critical components:
Audience understanding: A greater focus can be concentrated on who the audience is, what they need, and how they perceive information. Traditional models should consider the unique characteristics and needs of specific audiences. This lack of audience understanding can lead to data stories that are irrelevant, confusing, or even misleading.
Effective data storytelling requires a deep understanding of the audience’s demographics, psychographics, and information needs. This includes understanding their level of knowledge about the topic, their prior beliefs and attitudes, and their motivations for seeking information. By tailoring the data story to a specific audience, storytellers can increase engagement, comprehension, and persuasion.
Psychological principles: These models could be improved with insights from psychology that explain how people process information and make decisions. Without these elements, even the most beautifully designed data story may fall flat. Traditional models of data storytelling can be improved with two critical components that are essential for creating impactful and persuasive narratives: audience understanding and psychological principles.
By incorporating audience understanding and psychological principles into their storytelling process, data storytellers can create more effective and engaging narratives that resonate with their audience and drive desired outcomes.
Persuasion In Data Storytelling
All storytelling involves persuasion. Even if it’s a poorly told story and your audience chooses to ignore your message, you’ve persuaded them to do that. When your audience feels that you understand them, they are more likely to be persuaded by your message. Data-driven stories that speak to their hearts and minds are more likely to drive action. You can frame your message effectively when you have a deeper understanding of your audience.
Applying Psychological Principles To Data Storytelling
Humans process information based on psychological cues such as cognitive ease, social proof, and emotional appeal. By incorporating these principles, data storytellers can make their narratives more engaging, memorable, and persuasive.
Psychological principles help data storytellers tap into how people perceive, interpret, and remember information.
The Theory of Planned Behavior
While there is no single truth when it comes to how human behavior is created or changed, it is important for a data storyteller to use a theoretical framework to ensure they address the appropriate psychological factors of their audience. The Theory of Planned Behavior (TPB) is a commonly cited theory of behavior change in academic psychology research and courses. It’s useful for creating a reasonably effective framework to collect audience data and build a data story around it.
The TPB (Ajzen 1991) (Figure 5) aims to predict and explain human behavior. It consists of three key components:
- Attitude
This refers to the degree to which a person has a favorable or unfavorable evaluation of the behavior in question. An example of attitudes in the TPB is a person’s belief about the importance of regular exercise for good health. If an individual strongly believes that exercise is beneficial, they are likely to have a favorable attitude toward engaging in regular physical activity. - Subjective Norms
These are the perceived social pressures to perform or not perform the behavior. Keeping with the exercise example, this would be how a person thinks their family, peers, community, social media, and others perceive the importance of regular exercise for good health. - Perceived Behavioral Control
This component reflects the perceived ease or difficulty of performing the behavior. For our physical activity example, does the individual believe they have access to exercise in terms of time, equipment, physical capability, and other potential aspects that make them feel more or less capable of engaging in the behavior?
As shown in Figure 5, these three components interact to create behavioral intentions, which are a proxy for actual behaviors that we often don’t have the resources to measure in real-time with research participants (Ajzen, 1991).

UX researchers and data storytellers should develop a working knowledge of the TPB or another suitable psychological theory before moving on to measure the audience’s attitudes, norms, and perceived behavioral control. We have included additional resources to support your learning about the TPB in the references section of this article.
How To Understand Your Audience And Apply Psychological Principles
OK, we’ve covered the importance of audience understanding and psychology. These two principles serve as the foundation of the proposed model of storytelling we’re putting forth. Let’s explore how to integrate them into your storytelling process.
Introducing The Audience Research Informed Data Storytelling Model (ARIDSM)
At the core of successful data storytelling lies a deep understanding of your audience’s psychology. Here’s a five-step process to integrate UX research and psychological principles effectively into your data stories:

Step 1: Define Clear Objectives
Before diving into data, it’s crucial to establish precisely what you aim to achieve with your story. Do you want to inform, persuade, or inspire action? What specific message do you want your audience to take away?
Why it matters: Defining clear objectives provides a roadmap for your storytelling journey. It ensures that your data, narrative, and visuals are all aligned toward a common goal. Without this clarity, your story risks becoming unfocused and losing its impact.
How to execute Step 1: Start by asking yourself:
- What is the core message I want to convey?
- What do I want my audience to think, feel, or do after experiencing this story?
- How will I measure the success of my data story?
Frame your objectives using action verbs and quantifiable outcomes. For example, instead of “raise awareness about climate change,” aim to “persuade 20% of the audience to adopt one sustainable practice.”
Example:
Imagine you’re creating a data story about employee burnout. Your objective might be to convince management to implement new policies that promote work-life balance, with the goal of reducing reported burnout cases by 15% within six months.
Step 2: Conduct UX Research To Understand Your Audience
This step involves gathering insights about your audience: their demographics, needs, motivations, pain points, and how they prefer to consume information.
Why it matters: Understanding your audience is fundamental to crafting a story that resonates. By knowing their preferences and potential biases, you can tailor your narrative and data presentation to capture their attention and ensure the message is clearly understood.
How to execute Step 2: Employ UX research methods like surveys, interviews, persona development, and testing the message with potential audience members.
Example:
If your data story aims to encourage healthy eating habits among college students, your research might conduct a survey of students to determine what types of attitudes exist towards specific types of healthy foods for eating, to apply that knowledge in your data story.
Step 3: Analyze and Select Relevant Audience Data
This step bridges the gap between raw data and meaningful insights. It involves exploring your data to identify patterns, trends, and key takeaways that support your objectives and resonate with your audience.
Why it matters: Careful data analysis ensures that your story is grounded in evidence and that you’re using the most impactful data points to support your narrative. This step adds credibility and weight to your story, making it more convincing and persuasive.
How to execute Step 3:
- Clean and organize your data.
Ensure accuracy and consistency before analysis. - Identify key variables and metrics.
This will be determined by the psychological principle you used to inform your research. Using the TPB, we might look closely at how we measured social norms to understand directionally how the audience perceives social norms around the topic of the data story you are sharing, allowing you to frame your call to action in ways that resonate with these norms. You might run a variety of statistics at this point, including factor analysis to create groups based on similar traits, t-tests to determine if averages on your measurements are significantly different between groups, and correlations to see if there might be an assumed direction between scores on various items.
Example:
If your objective is to demonstrate the effectiveness of a new teaching method, analyzing how your audience perceives their peers to be open to adopting new methods, their belief that they are in control over the decision to use a new teaching method, and their attitude towards the effectiveness of their current teaching methods to create groups that have various levels of receptivity in trying new methods, allowing you to later tailor your data story for each group.
Step 4: Apply The Theory of Planned Behavior Or Your Psychological Principle Of Choice [Done Simultaneous With Step 3]
In this step, you will see that The Theory of Planned Behavior (TPB) provides a robust framework for understanding the factors that drive human behavior. It posits that our intentions, which are the strongest predictors of our actions, are shaped by three core components: attitudes, subjective norms, and perceived behavioral control. By consciously incorporating these elements into your data story, you can significantly enhance its persuasive power.
Why it matters: The TPB offers valuable insights into how people make decisions. By aligning your narrative with these psychological drivers, you increase the likelihood of influencing your audience’s intentions and, ultimately, their behavior. This step adds a layer of strategic persuasion to your data storytelling, making it more impactful and effective.
How to execute Step 4:
Here’s how to leverage the TPB in your data story:
Influence Attitudes: Present data and evidence that highlight the positive consequences of adopting the desired behavior. Frame the behavior as beneficial, valuable, and aligned with the audience’s values and aspirations.
This is where having a deep knowledge of the audience is helpful. Let’s imagine you are creating a data story on exercise and your call to action promoting exercise daily. If you know your audience has a highly positive attitude towards exercise, you can capitalize on that and frame your language around the benefits of exercising, increasing exercise, or specific exercises that might be best suited for the audience. It’s about framing exercise not just as a physical benefit but as a holistic improvement to their life. You can also tie it to their identity, positioning exercise as an integral part of living the kind of life they aspire to.
Shape Subjective Norms: Demonstrate that the desired behavior is widely accepted and practiced by others, especially those the audience admires or identifies with. Knowing ahead of time if your audience thinks daily exercise is something their peers approve of or engage in will allow you to shape your messaging accordingly. Highlight testimonials, success stories, or case studies from individuals who mirror the audience’s values.
If you were to find that the audience does not consider exercise to be normative amongst peers, you would look for examples of similar groups of people who do exercise. For example, if your audience is in a certain age group, you might focus on what data you have that supports a large percentage of those in their age group engaging in exercise.
Enhance Perceived Behavioral Control: Address any perceived barriers to adopting the desired behavior and provide practical solutions. For instance, when promoting daily exercise, it’s important to acknowledge the common obstacles people face — lack of time, resources, or physical capability — and demonstrate how these can be overcome.
Step 5: Craft A Balanced And Persuasive Narrative
This is where you synthesize your data, audience insights, psychological principles (including the TPB), and storytelling techniques into a compelling and persuasive narrative. It’s about weaving together the logical and emotional elements of your story to create an experience that resonates with your audience and motivates them to act.
Why it matters: A well-crafted narrative transforms data from dry statistics into a meaningful and memorable experience. It ensures that your audience not only understands the information but also feels connected to it on an emotional level, increasing the likelihood of them internalizing the message and acting upon it.
How to execute Step 5:
Structure your story strategically: Use a clear narrative arc that guides your audience through the information. Begin by establishing the context and introducing the problem, then present your data-driven insights in a way that supports your objectives and addresses the TPB components. Conclude with a compelling call to action that aligns with the attitudes, norms, and perceived control you’ve cultivated throughout the narrative.
Example:
In a data story about promoting exercise, you could:
- Determine what stories might be available using the data you have collected or obtained. In this example, let’s say you work for a city planning office and have data suggesting people aren’t currently biking as frequently as they could, even if they are bike owners.
- Begin with a relatable story about lack of exercise and its impact on people’s lives. Then, present data on the benefits of cycling, highlighting its positive impact on health, socializing, and personal feelings of well-being (attitudes).
- Integrate TPB elements: Showcase stories of people who have successfully incorporated cycling into their daily commute (subjective norms). Provide practical tips on bike safety, route planning, and finding affordable bikes (perceived behavioral control).
- Use infographics to compare commute times and costs between driving and cycling. Show maps of bike-friendly routes and visually appealing images of people enjoying cycling.
- Call to action: Encourage the audience to try cycling for a week and provide links to resources like bike share programs, cycling maps, and local cycling communities.
Evaluating The Method
Our next step is to test our hypothesis that incorporating audience research and psychology into creating a data story will lead to more powerful results. We have conducted preliminary research using messages focused on climate change, and our results suggest some support for our assertion.
We purposely chose a controversial topic because we believe data storytelling can be a powerful tool. If we want to truly realize the benefits of effective data storytelling, we need to focus on topics that matter. We also know that academic research suggests it is more difficult to shift opinions or generate behavior around topics that are polarizing (at least in the US), such as climate change.
We are not ready to share the full results of our study. We will share those in an academic journal and in conference proceedings. Here is a look at how we set up the study and how you might do something similar when either creating a data story using our method or doing your own research to test our model. You will see that it closely aligns with the model itself, with the added steps of testing the message against a control message and taking measurements of the actions the message(s) are likely to generate.
Step 1: We chose our topic and the data set we wanted to explore. As I mentioned, we purposely went with a polarizing topic. My academic background was in messaging around conservation issues, so we explored that. We used data from a publicly available data set that states July 2023 was the hottest month ever recorded.
Step 2: We identified our audience and took basic measurements. We decided our audience would be members of the general public who do not have jobs working directly with climate data or other relevant fields for climate change scientists.
We wanted a diverse range of ages and backgrounds, so we screened for this in our questions on the survey to measure the TPB components as well. We created a survey to measure the elements of the TPB as it relates to climate change and administered the survey via a Google Forms link that we shared directly, on social media posts, and in online message boards related to topics of climate change and survey research.
Step 3: We analyzed our data and broke our audience into groups based on key differences. This part required a bit of statistical know-how. Essentially, we entered all of the responses into a spreadsheet and ran a factor analysis to define groups based on shared attributes. In our case, we found two distinct groups for our respondents. We then looked deeper into the individual differences between the groups, e.g., group 1 had a notably higher level of positive attitude towards taking action to remediate climate change.
Step 4 [remember this happens simultaneously with step 3]: We incorporated aspects of the TPB in how we framed our data analysis. As we created our groups and looked at the responses to the survey, we made sure to note how this might impact the story for our various groups. Using our previous example, a group with a higher positive attitude toward taking action might need less convincing to do something about climate change and more information on what exactly they can do.
Table 1 contains examples of the questions we asked related to the TPB. We used the guidance provided here to generate the survey items to measure the TPB related to climate change activism. Note that even the academic who created the TPB states there are no standardized questions (PDF) validated to measure the concepts for each individual topic.
| Item | Measures | Scale |
|---|---|---|
| How beneficial do you believe individual actions are compared to systemic changes (e.g., government policies) in tackling climate change? | Attitude | 1 to 5 with 1 being “not beneficial” and 5 being “extremely beneficial” |
| How much do you think the people you care about (family, friends, community) expect you to take action against climate change? | Subjective Norms | 1 to 5 with 1 being “they do not expect me to take action” and 5 being “they expect me to take action” |
| How confident are you in your ability to overcome personal barriers when trying to reduce your environmental impact? | Perceived Behavioral Control | 1 to 5 with 1 being “not at all confident” and 5 being “extremely confident” |
Table 1: Examples of questions we used to measure the TPB factors. We asked multiple questions for each factor and then generated a combined mean score for each component.
Step 5: We created data stories aligned with the groups and a control story. We created multiple stories to align with the groups we identified in our audience. We also created a control message that lacked substantial framing in any direction. See below for an example of the control data story (Figure 7) and one of the customized data stories (Figure 8) we created.


Step 6: We released the stories and took measurements of the likelihood of acting. Specific to our study, we asked the participants how likely they were to “Click here to LEARN MORE.” Our hypothesis was that individuals would express a notably higher likelihood to want to click to learn more on the data story aligned with their grouping, as compared to the competing group and the control group.
Step 7: We analyzed the differences between the preexisting groups and what they stated was their likelihood of acting. As I mentioned, our findings are still preliminary, and we are looking at ways to increase our response rate so we can present statistically substantiated findings. Our initial findings are that we do see small differences between the responses to the tailored data stories and the control data story. This is directionally what we would be expecting to see. If you are going to conduct a similar study or test out your messages, you would also be looking for results that suggest your ARIDS-derived message is more likely to generate the expected outcome than a control message or a non-tailored message.
Overall, we feel there is an exciting possibility and that future research will help us refine exactly what is critical about generating a message that will have a positive impact on your audience. We also expect there are better models of psychology to use to frame your measurements and message depending on the audience and topic.
For example, you might feel Maslow’s hierarchy of needs is more relevant to your data storytelling. You would want to take measurements related to these needs from your audience and then frame the data story using how a decision might help meet their needs.
Elevate Your Data Storytelling
Traditional models of data storytelling, while valuable, often fall short of effectively engaging and persuading audiences. This is primarily due to their neglect of crucial aspects such as audience understanding and the application of psychological principles. By incorporating these elements into the data storytelling process, we can create more impactful and persuasive narratives.
The five-step framework proposed in this article — defining clear objectives, conducting UX research, analyzing data, applying psychological principles, and crafting a balanced narrative — provides a roadmap for creating data stories that resonate with audiences on both a cognitive and emotional level. This approach ensures that data is not merely presented but is transformed into a meaningful experience that drives action and fosters change. As data storytellers, embracing this human-centric approach allows us to unlock the full potential of data and create narratives that truly inspire and inform.
Effective data storytelling isn’t a black box. You can test your data stories for effectiveness using the same research process we are using to test our hypothesis as well. While there are additional requirements in terms of time as a resource, you will make this back in the form of a stronger impact on your audience when they encounter your data story if it is shown to be significantly greater than the impact of a control message or other messages you were considering that don’t incorporate the psychological traits of your audience.
Please feel free to use our method and provide any feedback on your experience to the author.
(yk)
How To Test And Measure Content In UX
How To Test And Measure Content In UX How To Test And Measure Content In UX Vitaly Friedman 2025-02-13T08:00:00+00:00 2025-03-04T21:34:45+00:00 Content testing is a simple way to test the clarity and understanding of the content on a page — be it a paragraph of text, […]
Ux
How To Test And Measure Content In UX
Vitaly Friedman 2025-02-13T08:00:00+00:00
2025-03-04T21:34:45+00:00
Content testing is a simple way to test the clarity and understanding of the content on a page — be it a paragraph of text, a user flow, a dashboard, or anything in between. Our goal is to understand how well users actually perceive the content that we present to them.
It’s not only about finding pain points and things that cause confusion or hinder users from finding the right answer on a page but also about if our content clearly and precisely articulates what we actually want to communicate.
.course-intro{–shadow-color:206deg 31% 60%;background-color:#eaf6ff;border:1px solid #ecf4ff;box-shadow:0 .5px .6px hsl(var(–shadow-color) / .36),0 1.7px 1.9px -.8px hsl(var(–shadow-color) / .36),0 4.2px 4.7px -1.7px hsl(var(–shadow-color) / .36),.1px 10.3px 11.6px -2.5px hsl(var(–shadow-color) / .36);border-radius:11px;padding:1.35rem 1.65rem}@media (prefers-color-scheme:dark){.course-intro{–shadow-color:199deg 63% 6%;border-color:var(–block-separator-color,#244654);background-color:var(–accent-box-color,#19313c)}}
This article is part of our ongoing series on UX. You can find more details on design patterns and UX strategy in Smart Interface Design Patterns 🍣 — with live UX training coming up soon. Free preview.
Banana Testing

A great way to test how well your design matches a user’s mental model is Banana Testing. We replace all key actions with the word “Banana,” then ask users to suggest what each action could prompt.
Not only does it tell you if key actions are understood immediately and if they are in the right place but also if your icons are helpful and if interactive elements such as links or buttons are perceived as such.
Content Heatmapping

One reliable technique to assess content is content heatmapping. The way we would use it is by giving participants a task, then asking them to highlight things that are clear or confusing. We could define any other dimensions or style lenses as well: e.g., phrases that bring more confidence and less confidence.
Then we map all highlights into a heatmap to identify patterns and trends. You could run it with print-outs in person, but it could also happen in Figjam or in Miro remotely — as long as your tool of choice has a highlighter feature.
Run Moderated Testing Sessions
These little techniques above help you discover content issues, but they don’t tell you what is missing in the content and what doubts, concerns, and issues users have with it. For that, we need to uncover user needs in more detail.
Too often, users say that a page is “clear and well-organized,” but when you ask them specific questions, you notice that their understanding is vastly different from what you were trying to bring into spotlight.
Such insights rarely surface in unmoderated sessions — it’s much more effective to observe behavior and ask questions on the spot, be it in person or remote.
Test Concepts, Not Words

Before testing, we need to know what we want to learn. First, write up a plan with goals, customers, questions, script. Don’t tweak words alone — broader is better. In the session, avoid speaking aloud as it’s usually not how people consume content. Ask questions and wait silently.
After the task is completed, ask users to explain the product, flow, and concepts to you. But: don’t ask them what they like, prefer, feel, or think. And whenever possible, avoid the word “content” in testing as users often perceive it differently.
Choosing The Right Way To Test
There are plenty of different tests that you could use:
- Banana test 🍌
Replace key actions with “bananas,” ask to explain. - Cloze test 🕳️
Remove words from your copy, ask users to fill in the blanks. - Reaction cards 🤔
Write up emotions on 25 cards, ask users to choose. - Card sorting 🃏
Ask users to group topics into meaningful categories. - Highlighting 🖍️
Ask users to highlight helpful or confusing words. - Competitive testing 🥊
Ask users to explain competitors’ pages.
When choosing the right way to test, consider the following guidelines:
- Do users understand?
Interviews, highlighting, Cloze test - Do we match the mental model?
Banana testing, Cloze test - What word works best?
Card sorting, A/B testing, tree testing - Why doesn’t it work?
Interviews, highlighting, walkthroughs - Do we know user needs?
Competitive testing, process mapping
Wrapping Up
In many tasks, there is rarely anything more impactful than the careful selection of words on a page. However, it’s not only the words alone that are being used but the voice and tone that you choose to communicate with customers.
Use the techniques above to test and measure how well people perceive content but also check how they perceive the end-to-end experience on the site.
Quite often, the right words used incorrectly on a key page can convey a wrong message or provide a suboptimal experience. Even though the rest of the product might perform remarkably well, if a user is blocked on a critical page, they will be gone before you even blink.
Useful Resources
- Practical Guide To Content Testing, by Intuit
- How To Test Content With Users, by Kate Moran
- Five Fun Ways To Test Words, by John Saito
- A Simple Technique For Evaluating Content, by Pete Gale
New: How To Measure UX And Design Impact
Meet Measure UX & Design Impact (8h), a new practical guide for designers and UX leads to measure and show your UX impact on business. Use the code 🎟 IMPACT to save 20% off today. Jump to the details.

Video + UX Training
$ 495.00 $ 799.00
Get Video + UX Training
25 video lessons (8h) + Live UX Training.
100 days money-back-guarantee.
Video only
$ 250.00$ 395.00
25 video lessons (8h). Updated yearly.
Also available as a UX Bundle with 2 video courses.
(cm, vf, il)
The Role Of Illustration Style In Visual Storytelling
The Role Of Illustration Style In Visual Storytelling The Role Of Illustration Style In Visual Storytelling Thomas Bohm 2025-01-14T08:00:00+00:00 2025-03-04T21:34:45+00:00 Illustration has been used for 10,000 years. One of the first ever recorded drawings was of a hand silhouette found in Spain, that is more […]
Ux
The Role Of Illustration Style In Visual Storytelling
Thomas Bohm 2025-01-14T08:00:00+00:00
2025-03-04T21:34:45+00:00
Illustration has been used for 10,000 years. One of the first ever recorded drawings was of a hand silhouette found in Spain, that is more than 66,000 years old. Fast forward to the introduction of the internet, around 1997, illustration has gradually increased in use. Popular examples of this are Google’s daily doodles and the Red Bull energy drink, both of which use funny cartoon illustrations and animations to great effect.
Typically, illustration was done using pencils, chalk, pens, etchings, and paints. But now everything is possible — you can do both analog and digital or mixed media styles.
As an example, although photography might be the most popular method to communicate visuals, it is not automatically the best default solution. Illustration offers a wider range of styles that help companies engage and communicate with their audience. Good illustrations create a mood and bring to life ideas and concepts from the text. To put it another way, visualisation.
Good illustrations can also help give life to information in a better way than just using text, numbers, or tables.
How do we determine what kind of illustration or style would be best? How should illustration complement or echo your corporate identity? What will your main audience prefer? What about the content, what would suit and highlight the content best, and how would it work for the age range it is primarily for?
Before we dive into the examples, let’s discuss the qualities of good illustration and the importance of understanding your audience. The rubric below will help you make good choices for your audience’s benefit.
What Makes A Good Illustration
- Visualises something from the content (something that does not exist or has been described but not visualised).
- Must be aesthetically pleasing, interesting, and stimulating to look at (needs to have qualities and harmonies between colour, elements, proportions, and subject matter).
- Must have a feel, mood, dramatic edge, or attitude (needs to create a feeling and describe or bring to life an environment).
- The illustration should enhance and bring to life what is described in text and word form.
- Explains or unpacks what is written in any surrounding text and makes it come to life in an unusual and useful way (the illustration should complement and illuminate the content so readers better understand the content).
Just look at what we are more often than not presented with.

The importance of knowing about different audiences
It is really important to know and consider different audiences. Not all of us are the same and have the same physical, cognitive, education, or resources. Our writing, designs, and illustrations need to take into account users’ make-up and capabilities.
There are some common categories of audiences:
- Child,
- Teenager,
- Middle-aged,
- Ageing,
- Prefer a certain style (goth, retro, modern, old fashioned, sporty, branded).
Below are interesting examples of illustrations, in no particular order, that show how different styles communicate and echo different qualities and affect mood and tone.
Watercolour
Good for formal, classy, and sophisticated imagery that also lends itself to imaginative expression. It is a great example of texture and light that delivers a really humane and personal feel that you would not get automatically by using software.
Strengths
- Feeling, emotion, and sense of depth and texture.

Drawing With Real-life objects
A great option for highly abstract concepts and compositions with a funny, unusual, and unreal aspect. You can do some really striking and clever stuff with this style to engage readers in your content.
Strengths
- Conceptual play.

Surreal Photomontage
Perfect for abstract hybrid illustration and photo illustration with a surreal fantasy aspect. This is a great example of merging different imagery together to create a really dramatic, scary, and visually arresting new image that fits the musician’s work as well.
Strengths
- Conceptual mixing and merging, leading to new unseen imagery.

Cartoon
Well-suited for showing fun or humorous aspects, creating concepts with loads of wit and cleverness. New messages and forms of communication can be created with this style.
Strengths
- Conceptual.

Cartoon With Block Colour
Works well for showing fun, quirky, or humorous aspects and concepts, often with loads of wit and cleverness. The simplicity of style can be quite good for people who struggle with more advanced imagery concepts, making it quite accessible.
Strengths
- Simplicity and unclutteredness.

Clean Vector
Designed for clean and clear illustrations that are all-encompassing and durable. Due to the nature of this illustration style, it works quite well for a wide range of people as it is not overly stylistic in one direction or another.
Strengths
- Realism, conceptual, and widely pleasing.

Textured Vintage Clean Vector
Best suited for imagining rustic imagery, echoing a vintage feel. This a great example of how texture and non-cleanliness can create and enhance the feeling of the imagery; it is very Western and old-fashioned, perfect for the core meaning of the illustration.
Strengths
- Aged feeling and rough impression.

Pictogram
Highly effective for clean, legible, quickly recognizable imagery and concepts, especially at small sizes as well. It is no surprise that many pictograms are to be seen in quick viewing environments such as airports and show imagery that has to work for a wide range of people.
Strengths
- Legibility, speed of comprehension (accessibility).

Abstract Geometric
A great option for visually attractive and abstract imagery and concepts. This style lends itself to much customising and experimentation from the illustrator, giving some really cool and visually striking results.
Strengths
- Visual stimulation and curiosity.

Lithography Etching
Ideal for imagery that has an old, historic, and traditional feel. Has a great feel achieved through sketchy markings, etchings, and a greyscale colour palette. You would not automatically get this from software, but given the right context or maybe an unusual juxtaposed context (like the clash against a modern, clean, fashionable corporate identity), it could work really well.
Strengths
- Realism and old tradition.

3D gradient
It serves as a great choice for highly realistic illustration with a friendly, widely accessible character element. This style is not overly stylistic and lends itself to being accepted by a wider range of people.
Strengths
- Widely acceptable and appropriate.

Sci-fi Comic Book And Pop Art
It’s especially useful for high-impact, bright, animated, and colourful concepts. Some really cool, almost animated graphic communication can be created with this style, which can also be put to much humorous use. The boldness and in-your-face style promote visual engagement.
Strengths
- Animation.

Tatoo
Well-suited for bold block-coloured silhouettes and imagery. It is so bold and impactful, and there is still loads of detail there, creating a really cool and sharp illustration. The illustration works well in black and white and would be further enhanced with colour.
Strengths
- Directness and clarity.

Pencil
Perfect for humane, detailed imagery with plenty of feeling and character. The sketchy style highlights unusual details and lends itself to an imaginative feeling and imagery.
Strengths
- Humane and detailed imaginative feeling.

Gradient
Especially useful for highly imaginative and fantasy imagery. By using gradients and a light-to-dark color palette, the imagery really has depth and says, ‘Take me away on a journey.’
Strengths
- Fantasy (through depth of colour) and clean feeling.

Charcoal
It makes an excellent option for giving illustration a humane and tangible feel, with echoes of old historical illustrations. The murky black-and-white illustration really has an atmosphere to it.
Strengths
- Humane and detailed feeling.

Woodcut
It offers great value for block silhouette imagery that has presence, sharpness, and impact. Is colour even needed? The black against the light background goes a long way to communicating the imagery.
Strengths
- Striking and clear.

Fashion
A great option for imagery that has motion and flare to it, with a slight feminine feel. No wonder this style of illustration is used for fashion illustrations, great for expressing lines and colours with motion, and has a real fashion runway flare.
Strengths
- Motion and expressive flare.

Caricature
Ideal for humorous imagery and illustration with a graphic edge and clarity. The layering of light and dark elements really creates an illustration with depth, perfect for playing with the detail of the character, not something you would automatically get from a clean vector illustration. It has received more thought and attention than clean vector illustration typically does.
Strengths
- Detail and humour.

Paint
It serves as a great choice for traditional romantic imagery that has loads of detail, texture, and depth of feeling. The rose flowers are a good example of this illustration style because they have so much detail and colour shades.
Strengths
- Tradition and emotions.

Chalk
Well-suited for highly sketchy imagery to make something an idea or working concept. The white lines against the black background have an almost animated effect and give the illustrations real movement and life. This style is a good example of using pure lines in illustration but to great effect.
Strengths
- Hand-realised and animation.

Illustration Sample Card

How To Start Doing Illustration
There are plenty of options, such as using pencils, chalk, pens, etchings, and paints, then possibly scanning in. You can also use software like Illustrator, Photoshop, Procreate, Corel Painter, Sketch, Inkscape, or Figma. But no matter what tools you choose, there’s one essential ingredient you’ll always need, and that is a mind and vision for illustration.
Recommended Resources
- Association of Illustrators
- “20 Best Illustration Agents In The UK, And The Awesome Illustrators They Represent,” Tom May
- It’s Nice That
- Behance Illustration
(yk)

9 Best WordPress Themes for 2025 (Free and Paid)
When it comes to building a WordPress website that doesn’t just look good today but can also hold its own tomorrow, staying power becomes paramount. For Hongkiat.com readers-web designers, developers, and creatives who value innovation-this is especially true. If a WordPress theme doesn’t look 2025-ready, […]
WordpressWhen it comes to building a WordPress website that doesn’t just look good today but can also hold its own tomorrow, staying power becomes paramount.
For Hongkiat.com readers-web designers, developers, and creatives who value innovation-this is especially true.
If a WordPress theme doesn’t look 2025-ready, doesn’t offer built-in flexibility, or hasn’t been actively maintained, it’s bound to cause headaches down the road.
Whichever design or theme you choose should be able to evolve alongside your business (or side project), not hold it back.
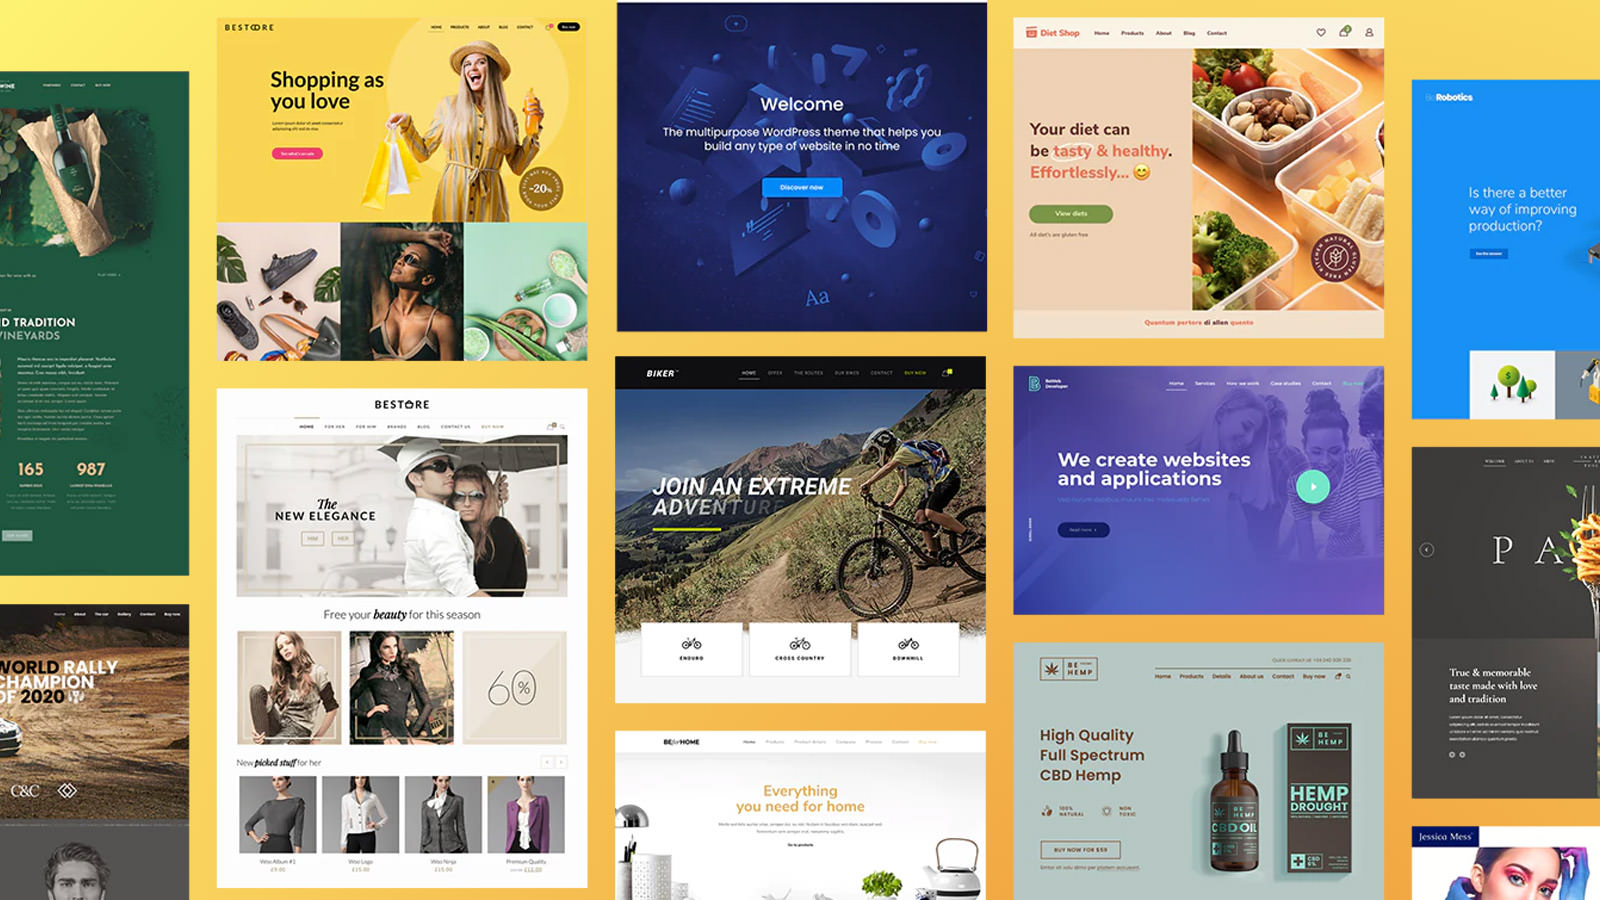
But with 5,000+ free and paid WordPress themes (and counting) on the market, it’s easy to feel lost.
So which ones really shine if you aim to stay ahead of the curve?
Below, we’ll take a look at the best WordPress themes (free and paid) in 2025-each one tested, refined, and backed by robust design capabilities.
The Best WordPress Themes for 2025 Include:
These themes feature intuitive page builders, beautiful designs, and the flexibility that developers crave. If you’re looking to streamline your workflow while ensuring your sites look next-level, read on.
Key Takeaways
- Focus on Future-Proofing: Themes must be actively updated and sport a contemporary look. That way, you won’t need to rebuild your site a year from now just because the theme is stuck in 2019.
- Thousands of Options-But Only a Few Will Do: With so many WordPress themes available, the real standouts for 2025 are those like UiCore PRO and Betheme, thanks to their extensive feature sets and design adaptability.
- Look for Developer-Friendly Features: A good theme in 2025 isn’t just about drag-and-drop. It’s about customization, easy mobile editing, high performance, and reliable support-all crucial for developers managing multiple sites or advanced features.
- Why These Themes Shine: Themes like UiCore PRO offer niche benefits such as agency-focused structures, while something like Betheme is famed for its multipurpose approach. Each suits a slightly different developer need, so you can choose based on your unique project.
- Support & Feedback: Themes with dedicated support-like Litho-often spark glowing reviews. This makes a difference when troubleshooting complex builds or rolling out advanced features.
What Sets These WordPress Themes Apart?
These top themes share defining traits that can streamline your development process and enhance your site’s UX.
- Ease of Use: Pre-built demos are fantastic, but only if they’re simple to edit. If you’re spending hours in a confusing backend, that’s a red flag. Themes highlighted here pride themselves on intuitive interfaces and well-documented builder tools.
- Multiple Builder Options: From WordPress’s native block editor (Gutenberg) to powerhouse plugins like Elementor, different developers have different preferences. These themes typically support multiple major page builders, ensuring you don’t have to alter your workflow.
- Flexible Customization: These best WordPress themes for 2025 come loaded with website demos, yet remain highly flexible. Tweak layouts, adjust color schemes, or integrate custom scripts-whatever your vision, you won’t be locked into a cookie-cutter style.
- Forward-Thinking Design: “2025-ready” means not just looking modern but ensuring sites can adapt to future design trends. The multipurpose demos included with each theme should remain fresh and relevant for years to come.
- Mobile Editing: A significant portion of web traffic comes from mobile devices. While nearly all top-tier themes boast responsive design, the page builder’s mobile editing features are vital. You need an easy way to refine how your site appears on various screen sizes.
- Performance: If a theme or builder loads slowly, everyone loses-developers spend more time waiting, and visitors bounce. Each theme here scores well on performance tests, so you can focus on building your site rather than dealing with speed issues.
- Reliable Customer Support: Even pro developers appreciate a guiding hand when deadlines loom. Whether it’s a ticket-based system, knowledge base, or community forum, these themes are backed by active support teams.
Quick Reality Check
It’s tempting to think finding a perfectly matched theme is a walk in the park. While the process can be straightforward with proper research, choosing a future-ready theme is crucial to avoid unexpected redesigns. Keep these points in mind:
- Make a Strong First Impression: Your site should look professional and stand out in a crowded online space. Every theme mentioned here can help you achieve that when used effectively.
- Future Readiness Is Non-Negotiable: As web standards shift, so do theme requirements. A theme that’s frequently updated and built on flexible code can evolve right along with your business-or your personal brand.
The Themes at a Glance
In creating this list, we considered:
- Performance & Adaptability
- Developer Tools
- Business Owner Requirements for 2025 and Beyond
All of these future-proof themes feature clean code, top-notch responsiveness, and SEO-ready structures.
Why These Themes Excel
- Performance: Comprehensive demo libraries to launch site projects quickly
- Ease of Use: Intuitive drag-and-drop builders for pages, headers, footers-even WooCommerce
- Adaptability: Design blocks, templates, developer-friendly layouts, and more
- Ongoing Support: Responsive help desks, thorough documentation, and video tutorials for quick problem-solving
Your Next Steps
Based on the context of the article discussing WordPress themes and their features, I’d complete the last point like this:
- Preview Themes & Builders: Take time to explore each theme’s demos. See if their builder tools align with your typical workflow, whether that’s Elementor, WPBakery, or another preferred editor.
- Match Templates to Project Specs: If you want to see how a theme might look for an eCommerce site versus a personal portfolio, explore the pre-built websites and templates. These provide insight into the theme’s range and design capabilities.
- Pick One That Feels Right: Ultimately, the best theme is the one that keeps pace with your vision and offers the right balance of features, customization options, and ease of use for your specific needs.
1. UiCore Pro: WordPress Theme for Gutenberg and Elementor
A powerful yet creative-friendly theme built for Elementor users, offering an expansive library of templates. Ideal if you need quick setups with high design flexibility.
UiCore Pro’s impressive array of blocks, widgets, and page sections allows you to customize every nook and cranny of your website.
Its standout feature is its huge library of website templates, template blocks, and inner pages. A beautiful example is Slate, a UiCore Pro top 10 downloaded demo in 2024. Slate would provide an ideal template for creating a services-oriented startup. New demos/pre-built websites are added to the existing library of 60+ pre-built websites monthly.
Other features you will love:
- Next-Gen Theme Options: Provides total control over your site’s look and feel
- Theme Builder: Does the same for the static elements of your website
- Premium Widgets: 250+ premium widgets that take the place of plugins you might otherwise need to generate traffic to your site
- Admin Customizer: Allows users to personalize the admin panel’s look and feel to suit their preferences
- White Label Option: Ideal for anyone interested in customizing UiCore Pro to conform to their own brand
Primary users include Agencies, Architects, Online Shop owners, Startups, and SaaS providers.
Current Rating: 4.6 on Trustpilot
2. Betheme: Fastest Theme of Them All
A top-tier multipurpose theme boasting 700+ pre-built sites. It’s speedy, feature-rich, and perfect for developers juggling various client projects or design styles.
With Betheme it’s possible to build virtually any type or style website quickly. That is good news for busy web designers, web developers and businesses seeking an online presence.
Betheme’s standout feature (one of several) is its outstanding library of 700+ responsive and fully customizable pre-built websites, and each is just a click away. New demos are made available every month.
How would one of these pre-built websites help you get a project off to a quick start? Try the Be Gadget example, a top downloaded demo in 2024. If you are thinking of opening a small online shop you might be able to put it to immediate use.
Other cool features include:
- Superfast BeBuilder: Completely rewritten for enhanced speed and performance, making site building faster than ever
- WooBuilder: Includes 40+ WooCommerce demos, allowing quick and easy creation of online stores
- Customizable Layouts: Offers flexible layout options for portfolio, blog, and shop pages
- Tools for All Users: A Developer Mode and a Query Loop Builder for developers, Popups for Marketers, and a WooCommerce Builder for sellers
- Five-Star Customer Support: Betheme’s customer service center ensures five-star treatment
3. Blocksy: Popular WooCommerce Theme
Lightweight and Gutenberg-friendly, Blocksy is a smart choice for minimalists aiming for modern WooCommerce sites. Expect faster loading times and easy customizations.
Blocksy’s standout feature is its Header Builder that enables you to craft a header that exactly fits your brand. Header elements offer a range of customization options that allow you to design user-friendly and engaging headers. Blocksy is fully integrated with WooCommerce and is an ideal choice for shop owners and web designers with business and marketing clients.
- Starter Site Example: Would you be interested in an idea or example to help initiate a project for a startup business? Blocksy’s Biz Consult starter site example might be just what you need. Be sure to view the live video to get the full effect
- Monthly Pre-Built Sites: New pre-built website selections are released monthly
- Easy Customization: Every part of a Blocksy-designed site will lend itself to easy customization
- Developer-Friendly Tools: Blocksy’s functionality extending hooks, filters, and actions make it developer friendly
- WooCommerce Integration: Blocksy is fully integrated with WooCommerce and is an ideal choice for shop owners and web designers with business and marketing clients
- Top-Notch Support: The average ticket resolution time is less than 24 hours. Documentation and selections of YouTube videos are readily available
Current Rating: 4.97 on WordPress.org
4. Litho: Modern and Creative Elementor WordPress Theme
An Elementor-compatible theme with fresh demos and robust customization options. Great if you’re into dynamic effects, unique animations, and bold visual elements.
Litho is an all-purpose theme that can be used for any type of business or industry niche, whether the need is to create a website, a portfolio, a blog, or all the above.
Features include 37+ ready home pages, 200+ creative elements, and more than 300 templates, all of which can be imported with a single click. Are you in need of a template of an idea for a startup site? Litho’s Home Startup example could be just what you need to get your project underway.
Litho has plenty more to offer, including:
- Integrated Header-Footer Builder: Choose from pre-built layouts or design custom headers and footers tailored to your needs
- Client-Specific Features: Designed to meet the needs of digital agencies, businesses, bloggers, shop owners, and more
- Portfolio Features: Cool portfolio-build features that include attractive hover styles
- Plugin Compatibility: Compatibility with most well-known free and premium plugins, including WooCommerce
Support includes online documentation, YouTube videos, and installation and update guidelines. Average support ticket time less than 24 hours.
5. Uncode: WordPress Theme for Creatives
A design-focused theme spotlighting pixel-perfect layouts and smooth UX. Fantastic for creative portfolios or visually engaging projects.
Uncode does not advertise a main feature, and its primary client or target use would be any person, enterprise, or niche.
- Demo Popularity: Uncode’s demos are extremely popular with its users. They often provide the ideas and inspiration that needed to get a project underway
- User Showcase: Uncode even highlights sites its users have created based on these demos
- Featured Demo: Take for example Uncode’s Creative Marketing demo, one of the most popular downloaded demos in 2024. It’s a real attention-getter featuring a clever hover effect and could be just what you are looking for to introduce yourself or your business!
The topical range of available pre-built designs is exceptional. New pre-built website releases take place every 3 to 6 months.
Other popular features include:
- Enhanced Frontend Page Builder: Comes with 85 meticulously designed modules for a streamlined and efficient building experience
- Wireframes Plugin: Includes access to a selection of 750+ wireframes
- Exceptional Support: First-rate support (ticket resolution less than 24 hrs.), plus there is a support group on Facebook
Updates are continuously released based on customer demands.
Current Rating: 4.89
6. Avada WordPress Theme: #1 Best Seller
One of the most popular WordPress themes around, backed by a powerful front-end builder. Versatile, scalable, and well-suited for eCommerce or complex sites.
They have plenty to say with Avada as it is the #1 best-selling WordPress theme of all time with 750,000+ satisfied customers; more than enough to suggest that theme, often referred to as the Swiss Army Knife of WordPress themes has everything going for it.
Avada Business pre-built website is a professional and fully customizable template. It is one you could easily use for showcasing corporate services or creating an awesome online presence for any business.
Avada is responsive, speed-optimized, WooCommerce ready, and lets you design anything you want the way you want to without touching a line of code.
Ideal for anyone from the first-time web designer to the professional with its:
- Responsive Framework: Ensures your website adapts perfectly to any screen size or device
- 1-Click Demo Importer: Quickly import pre-built demos
- Pre-Built Websites: 85+ professionally designed pre-built websites
- Live Visual Drag and Drop Builder: Build and customize your site with an intuitive drag-and-drop interface
- Advanced Theme Options: Capability to customize anything
- Extensive Design Library: 400+ pre-built web pages together with more than 120 design and layout elements
Avada is eCommerce enabled. You can expect to receive 5-star support from Avada’s support team while having ready access to free lifetime updates, its extensive video tutorial library, and its comprehensive documentation.
Avada has over 24,000 5-star reviews on ThemeForest. Current Rating: 4.77
7. Total: Easy Website Builder for All Levels
True to its name, Total delivers an all-in-one solution-a balance of simplicity and flexibility. Users can drag-and-drop their way to unique websites without steep learning curves.
Any website-building project type can benefit from using Total due to its superior flexibility, clean code, and its multiplicity of time-saving website building features.
Total’s standout feature is its easy page builder for DIYers. Total also features comprehensive selections of developer-friendly hooks, filters, snippets, and more.
- Flexible Page Builder Integration: Total uses WPBakery as its page builder as it considers it to be the superior page builder for WordPress. If you happen to be an Elementor fan, Total has built in integration with both Elementor and Gutenberg
- Extensive Design Features: Other features include dynamic layout templates, boxed and full-width layouts CSS effects (animations), custom backgrounds, sticky headers, mobile menu styles, and more
- Robust Design Resources: Total gives you more than 100 builder elements, 90+ WPBakery patterns, and 50+ premade demos to work with. The inspirational demos provide an excellent way to get a project off to a fast start. The Biz for example is a sweet little one-page website that could be used as the basis for starting a business
Current Rating: 4.86
8. Woodmart: Popular Multipurpose WooCommerce Theme
A WooCommerce-centric theme with advanced shop layout features and built-in performance optimizations. Perfect for devs who want to launch stylish, fast-loading stores.
A first glance at the Woodmart site can be a revelation in that you’re apt to experience an array of content sections that appear to have been created exactly the way you would like to be able to do it when you are having a good day.
Woodmart’s standout feature is its custom layout builder for shop, product cart, and other client-centric features that include “Frequently Bought Together” and “Dynamic Discounts.”
- Store-Focused Design: Much of what Woodmart offers is directed toward in-store design, but there are client-specific features as well including a White Label option, and social integrations for Marketers
- Scalable Store Solutions: Whether your goal is to create a small store, or a multivendor marketplace site, Woodmart has what you need to make it a success
- WooCommerce-Based: Fully integrated with WooCommerce, so you won’t need additional plugins to build your store
Woodmart’s Mega Electronics demo is a great example of the realism you can expect. Substitute your content and you have your store. A new selection of demos is released every month.
9. Pro Theme + Cornerstone Builder: Most Advanced WP Theme
As these features are maintained at a high degree of usability Pro Theme’s standout feature is the constant flow of updates and features this theme can place before its users.
These features:
- Comprehensive Family of Builders: Includes a Header Builder, Page Builder, Footer Builder, Layout Builder, Blog Builder, Shop Builder, and more
- Design Cloud: Access a rich collection of design assets
- Max Service: Includes a wealth of premium plugins, templates, and multiple custom-designed websites from a leading personal brand agency that designs websites for various leading brands and celebrities
- Demo Collection: An excellent collection of demos like this Konnect example that can be used to kick off an online store project
- Extensive Support Resources: Support materials that feature a support manual, YouTube tutorial videos and a Forum
Updates are released every two weeks.
What is the ideal website project type that Pro supports? The answer is simple: Anything.
Why the Right WordPress Theme Matters
A WordPress theme sets the visual and functional foundation of your website.
In 2025, it’s not enough for a theme to look good on desktop alone.
It needs to:
- Work seamlessly with top page builders like Elementor, Gutenberg, or WPBakery
- Offer high-quality prebuilt templates, so you can launch quickly and efficiently
- Support mobile editing, ensuring visitors have a smooth experience on any device
- Provide reliable speed and overall stability, essential for keeping bounce rates low and user engagement high
- Feature dedicated support, so you won’t spend hours troubleshooting an issue that could be resolved in minutes
Spotting a Future-Ready Theme
Much like staying current with design trends and coding best practices, succeeding in WordPress means choosing a theme that’s actively maintained and flexible enough to adapt to technological changes.
A top-tier theme won’t restrict you to specific layouts or color schemes. Instead, it will let you experiment with everything from parallax effects to dynamic animations-without compromising performance.
Testing the Waters
Before committing, test-drive a theme’s builder tools and explore its templates. This hands-on approach reveals how well each theme matches your project’s requirements-whether you’re creating a personal portfolio, a sleek eCommerce shop, or something more experimental.
Making the Final Call
Ultimately, the best theme is one that supports your vision and has the performance capabilities to power your boldest ideas. With the right choice, you’ll avoid costly re-platforming later and can focus on innovation.
If you’re overwhelmed by the 5,000+ WordPress themes available, don’t worry. By focusing on builder compatibility, mobile responsiveness, speed, and reliable support, you’ll quickly identify the ideal themes to power your projects through 2024 and beyond.
| WordPress Theme | Quick Overview | Top Feature |
|---|---|---|
| UiCore PRO | Best WordPress theme for Elementor | Pre-built website templates for rapid design and customization |
| Betheme | Fastest WordPress and WooCommerce theme | 700+ pre-built websites, robust BeBuilder & WooBuilder for eCommerce |
| Blocksy | Superior for WooCommerce design with free version | Deep WooCommerce integrations and minimal bloat for fast-loading shops |
| Litho | Highly customizable theme | Diverse demos and advanced customization options for unique frontends |
| Uncode | WooCommerce Theme for Creatives | Creative layouts and minimal codebase for enhanced performance |
| Avada | #1 Best-Selling Theme | Built-in speed optimizations and robust eCommerce functionality |
| Total Theme | Easy Website Builder for all levels | Superior flexibility and clean code for customizing any layout |
| Woodmart | Perfect for shops and startups | Custom shop layout builder and performance optimizations for better UX |
| Pro Theme + Cornerstone Builder | Advanced theme with powerful real-time frontend builder for developers | Regular updates and code-friendly environment for advanced customization |
The post 9 Best WordPress Themes for 2025 (Free and Paid) appeared first on Hongkiat.

How to Install PHP Extensions Easily with PIE
Installing PHP extensions traditionally involved challenges like finding precompiled binaries, using OS package managers, or manually compiling from source. These methods could be inconsistent across platforms and required different commands, making the process complex and prone to errors. PECL, while helpful, feels antiquated. It’s not […]
CodingInstalling PHP extensions traditionally involved challenges like finding precompiled binaries, using OS package managers, or manually compiling from source. These methods could be inconsistent across platforms and required different commands, making the process complex and prone to errors.
PECL, while helpful, feels antiquated. It’s not as easy to put your extension in PHP as it is with Composer. PIE is an initiative from the PHP Foundation to solve this by treating extensions as Composer packages. It simplifies the process, offers better cross-platform consistency, and ensures easier updates and management for PHP extensions.
Prerequisites
Before we begin, ensure you have PHP 8.1 or newer to run PIE. However, PIE can install extensions for any installed PHP version. To check the PHP version on your computer, you can run: php -v

Installation
To install the PHP Installer for Extensions (PIE), you can follow these steps:
1. Download the PHAR package
First, you need to download the pie.phar file from the official repository or website. This is the primary file needed to use PIE.
2. PHAR installation
Move pie.phar into your computer’s PATH, such as /usr/local/bin/, so you can run it from anywhere. You can rename it for convenience, for example:
mv pie.phar /usr/local/bin/pie
On Windows, you can move it to C:Program Files or any other directory in your PATH. However, I recommend using Composer and its CLI with the Windows Subsystem for Linux (WSL) for a better experience.
3. Make it executable
On non-Windows machines, you need to change the permissions to make it executable.
chmod +x /usr/local/bin/pie
That’s it. You can try running pie in your terminal to see if it’s installed correctly.
We can now use PIE to install PHP extensions with ease using the pie command.
pie install <vendor>/<package>
For example, let’s say you want to install the xdebug extension to perform debugging in your PHP application. You can run:
pie install xdebug/xdebug
This command will pull the xdebug extension from Packagist, build it, and install it in your PHP installation. PIE will also add the extension to your php.ini file, so you don’t have to do it manually.
You can find all extensions that you can install through PIE in Packagist.
Note for Windows
PIE currently does not support building extensions on Windows. It relies on the extension author to provide the pre-built DLL file for their extension, so there are probably some extensions that you can’t install on Windows.
Wrapping Up
PIE is a great initiative to simplify the installation of PHP extensions. I like how it treats extensions as Composer packages, making it easier to manage and update them. I think it’s a step in the right direction to modernize the PHP ecosystem and make it more developer-friendly.
The post How to Install PHP Extensions Easily with PIE appeared first on Hongkiat.
Creating An Effective Multistep Form For Better User Experience
Creating An Effective Multistep Form For Better User Experience Creating An Effective Multistep Form For Better User Experience Amejimaobari Ollornwi 2024-12-03T10:00:00+00:00 2025-03-04T21:34:45+00:00 For a multistep form, planning involves structuring questions logically across steps, grouping similar questions, and minimizing the number of steps and the amount […]
Ux
Creating An Effective Multistep Form For Better User Experience
Amejimaobari Ollornwi 2024-12-03T10:00:00+00:00
2025-03-04T21:34:45+00:00
For a multistep form, planning involves structuring questions logically across steps, grouping similar questions, and minimizing the number of steps and the amount of required information for each step. Whatever makes each step focused and manageable is what should be aimed for.
In this tutorial, we will create a multistep form for a job application. Here are the details we are going to be requesting from the applicant at each step:
- Personal Information
Collects applicant’s name, email, and phone number. - Work Experience
Collects the applicant’s most recent company, job title, and years of experience. - Skills & Qualifications
The applicant lists their skills and selects their highest degree. - Review & Submit
This step is not going to collect any information. Instead, it provides an opportunity for the applicant to go back and review the information entered in the previous steps of the form before submitting it.
You can think of structuring these questions as a digital way of getting to know somebody. You can’t meet someone for the first time and ask them about their work experience without first asking for their name.
Based on the steps we have above, this is what the body of our HTML with our form should look like. First, the main <form> element:
<form id="jobApplicationForm">
  <!-- Step 1: Personal Information -->
  <!-- Step 2: Work Experience -->
  <!-- Step 3: Skills & Qualifications -->
  <!-- Step 4: Review & Submit -->
</form>
Step 1 is for filling in personal information, like the applicant’s name, email address, and phone number:
<form id="jobApplicationForm">
  <!-- Step 1: Personal Information -->
  <fieldset class="step" id="step-1">
    <legend id="step1Label">Step 1: Personal Information</legend>
    <label for="name">Full Name</label>
    <input type="text" id="name" name="name" required />
    <label for="email">Email Address</label>
    <input type="email" id="email" name="email" required />
    <label for="phone">Phone Number</label>
    <input type="tel" id="phone" name="phone" required />
  </fieldset>

  <!-- Step 2: Work Experience -->
  <!-- Step 3: Skills & Qualifications -->
  <!-- Step 4: Review & Submit -->
</form>
Once the applicant completes the first step, we’ll navigate them to Step 2, focusing on their work experience so that we can collect information like their most recent company, job title, and years of experience. We’ll tack on a new <fieldset> with those inputs:
<form id="jobApplicationForm">
  <!-- Step 1: Personal Information -->

  <!-- Step 2: Work Experience -->
  <fieldset class="step" id="step-2" hidden>
    <legend id="step2Label">Step 2: Work Experience</legend>
    <label for="company">Most Recent Company</label>
    <input type="text" id="company" name="company" required />
    <label for="jobTitle">Job Title</label>
    <input type="text" id="jobTitle" name="jobTitle" required />
    <label for="yearsExperience">Years of Experience</label>
    <input
      type="number"
      id="yearsExperience"
      name="yearsExperience"
      min="0"
      required
    />
  </fieldset>

  <!-- Step 3: Skills & Qualifications -->
  <!-- Step 4: Review & Submit -->
</form>
Step 3 is all about the applicant listing their skills and qualifications for the job they’re applying for:
<form id="jobApplicationForm">
  <!-- Step 1: Personal Information -->
  <!-- Step 2: Work Experience -->

  <!-- Step 3: Skills & Qualifications -->
  <fieldset class="step" id="step-3" hidden>
    <legend id="step3Label">Step 3: Skills & Qualifications</legend>
    <label for="skills">Skill(s)</label>
    <textarea id="skills" name="skills" rows="4" required></textarea>
    <label for="highestDegree">Degree Obtained (Highest)</label>
    <select id="highestDegree" name="highestDegree" required>
      <option value="">Select Degree</option>
      <option value="highschool">High School Diploma</option>
      <option value="bachelor">Bachelor's Degree</option>
      <option value="master">Master's Degree</option>
      <option value="phd">Ph.D.</option>
    </select>
  </fieldset>
  <!-- Step 4: Review & Submit -->
  <fieldset class="step" id="step-4" hidden>
    <legend id="step4Label">Step 4: Review & Submit</legend>
    <p>Review your information before submitting the application.</p>
    <button type="submit">Submit Application</button>
  </fieldset>
</form>
And, finally, we’ll allow the applicant to review their information before submitting it:
<form id="jobApplicationForm">
  <!-- Step 1: Personal Information -->
  <!-- Step 2: Work Experience -->
  <!-- Step 3: Skills & Qualifications -->

  <!-- Step 4: Review & Submit -->
  <fieldset class="step" id="step-4" hidden>
    <legend id="step4Label">Step 4: Review & Submit</legend>
    <p>Review your information before submitting the application.</p>
    <button type="submit">Submit Application</button>
  </fieldset>
</form>
Notice: We’ve added a hidden attribute to every fieldset element but the first one. This ensures that the user sees only the first step. Once they are done with the first step, they can proceed to fill out their work experience on the second step by clicking a navigational button. We’ll add this button later on.
Adding Styles
To keep things focused, we’re not going to be emphasizing the styles in this tutorial. What we’ll do to keep things simple is leverage the Simple.css style framework to get the form in good shape for the rest of the tutorial.
If you’re following along, we can include Simple’s styles in the document <head>:
<link rel="stylesheet" href="https://cdn.simplecss.org/simple.min.css" />
And from there, go ahead and create a style.css file with the following styles that I’ve folded up.
<details>
  <summary>View CSS</summary>
  body {
    min-height: 100vh;
    display: flex;
    align-items: center;
    justify-content: center;
  }
  main {
    padding: 0 30px;
  }
  h1 {
    font-size: 1.8rem;
    text-align: center;
  }
  .stepper {
    display: flex;
    justify-content: flex-end;
    padding-right: 10px;
  }
  form {
    box-shadow: 0px 0px 6px 2px rgba(0, 0, 0, 0.2);
    padding: 12px;
  }
  input,
  textarea,
  select {
    outline: none;
  }
  input:valid,
  textarea:valid,
  select:valid,
  input:focus:valid,
  textarea:focus:valid,
  select:focus:valid {
    border-color: green;
  }
  input:focus:invalid,
  textarea:focus:invalid,
  select:focus:invalid {
    border: 1px solid red;
  }
</details>
Form Navigation And Validation
An easy way to ruin the user experience for a multi-step form is to wait until the user gets to the last step in the form before letting them know of any error they made along the way. Each step of the form should be validated for errors before moving on to the next step, and descriptive error messages should be displayed to enable users to understand what is wrong and how to fix it.
Now, the only part of our form that is visible is the first step. To complete the form, users need to be able to navigate to the other steps. We are going to use several buttons to pull this off. The first step is going to have a Next button. The second and third steps are going to have both a Previous and a Next button, and the fourth step is going to have a Previous and a Submit button.
<form id="jobApplicationForm">
  <!-- Step 1: Personal Information -->
  <fieldset>
    <!-- ... -->
    <button type="button" class="next" onclick="nextStep()">Next</button>
  </fieldset>

  <!-- Step 2: Work Experience -->
  <fieldset>
    <!-- ... -->
    <button type="button" class="previous" onclick="previousStep()">Previous</button>
    <button type="button" class="next" onclick="nextStep()">Next</button>
  </fieldset>

  <!-- Step 3: Skills & Qualifications -->
  <fieldset>
    <!-- ... -->
    <button type="button" class="previous" onclick="previousStep()">Previous</button>
    <button type="button" class="next" onclick="nextStep()">Next</button>
  </fieldset>

  <!-- Step 4: Review & Submit -->
  <fieldset>
    <!-- ... -->
    <button type="button" class="previous" onclick="previousStep()">Previous</button>
    <button type="submit">Submit Application</button>
  </fieldset>
</form>
Notice: We’ve added onclick attributes to the Previous and Next buttons to link them to their respective JavaScript functions: previousStep() and nextStep().
The “Next” Button
The nextStep() function is linked to the Next button. Whenever the user clicks the Next button, the nextStep() function will first check to ensure that all the fields for whatever step the user is on have been filled out correctly before moving on to the next step. If the fields haven’t been filled correctly, it displays some error messages, letting the user know that they’ve done something wrong and informing them what to do to make the errors go away.
Before we go into the implementation of the nextStep function, there are certain variables we need to define because they will be needed in the function. First, we need the input fields from the DOM so we can run checks on them to make sure they are valid.
// Step 1 fields
const name = document.getElementById("name");
const email = document.getElementById("email");
const phone = document.getElementById("phone");

// Step 2 fields
const company = document.getElementById("company");
const jobTitle = document.getElementById("jobTitle");
const yearsExperience = document.getElementById("yearsExperience");

// Step 3 fields
const skills = document.getElementById("skills");
const highestDegree = document.getElementById("highestDegree");
Then, we’re going to need an array to store our error messages.
let errorMsgs = [];
Also, we would need an element in the DOM where we can insert those error messages after they’ve been generated. This element should be placed in the HTML just below the last fieldset closing tag:
<div id="errorMessages" style="color: rgb(253, 67, 67)"></div>
Add the above div to the JavaScript code using the following line:
const errorMessagesDiv = document.getElementById("errorMessages");
And finally, we need a variable to keep track of the current step.
let currentStep = 1;
Now that we have all our variables in place, here’s the implementation of the nextstep() function:
function nextStep() {
  errorMsgs = [];
  errorMessagesDiv.innerText = "";

  switch (currentStep) {
    case 1:
      addValidationErrors(name, email, phone);
      validateStep(errorMsgs);
      break;

    case 2:
      addValidationErrors(company, jobTitle, yearsExperience);
      validateStep(errorMsgs);
      break;

    case 3:
      addValidationErrors(skills, highestDegree);
      validateStep(errorMsgs);
      break;
  }
}
The moment the Next button is pressed, our code first checks which step the user is currently on, and based on this information, it validates the data for that specific step by calling the addValidationErrors() function. If there are errors, we display them. Then, the form calls the validateStep() function to verify that there are no errors before moving on to the next step. If there are errors, it prevents the user from going on to the next step.
Whenever the nextStep() function runs, the error messages are cleared first to avoid appending errors from a different step to existing errors or re-adding existing error messages when the addValidationErrors function runs. The addValidationErrors function is called for each step using the fields for that step as arguments.
Here’s how the addValidationErrors function is implemented:
function addValidationErrors(fieldOne, fieldTwo, fieldThree = undefined) {
  if (!fieldOne.checkValidity()) {
    const label = document.querySelector(`label[for="${fieldOne.id}"]`);
    errorMsgs.push(`Please Enter A Valid ${label.textContent}`);
  }

  if (!fieldTwo.checkValidity()) {
    const label = document.querySelector(`label[for="${fieldTwo.id}"]`);
    errorMsgs.push(`Please Enter A Valid ${label.textContent}`);
  }

  if (fieldThree && !fieldThree.checkValidity()) {
    const label = document.querySelector(`label[for="${fieldThree.id}"]`);
    errorMsgs.push(`Please Enter A Valid ${label.textContent}`);
  }

  if (errorMsgs.length > 0) {
    errorMessagesDiv.innerText = errorMsgs.join("n");
  }
}
This is how the validateStep() function is defined:
function validateStep(errorMsgs) {
  if (errorMsgs.length === 0) {
    showStep(currentStep + 1);
  }
}
The validateStep() function checks for errors. If there are none, it proceeds to the next step with the help of the showStep() function.
function showStep(step) {
  steps.forEach((el, index) => {
    el.hidden = index + 1 !== step;
  });
  currentStep = step;
}
The showStep() function requires the four fieldsets in the DOM. Add the following line to the top of the JavaScript code to make the fieldsets available:
const steps = document.querySelectorAll(".step");
What the showStep() function does is to go through all the fieldsets in our form and hide whatever fieldset is not equal to the one we’re navigating to. Then, it updates the currentStep variable to be equal to the step we’re navigating to.
The “Previous” Button
The previousStep() function is linked to the Previous button. Whenever the previous button is clicked, similarly to the nextStep function, the error messages are also cleared from the page, and navigation is also handled by the showStep function.
function previousStep() {
  errorMessagesDiv.innerText = "";
  showStep(currentStep - 1);
}
Whenever the showStep() function is called with “currentStep - 1” as an argument (as in this case), we go back to the previous step, while moving to the next step happens by calling the showStep() function with “currentStep + 1” as an argument (as in the case of the validateStep() function).
Improving User Experience With Visual Cues
One other way of improving the user experience for a multi-step form, is by integrating visual cues, things that will give users feedback on the process they are on. These things can include a progress indicator or a stepper to help the user know the exact step they are on.
Integrating A Stepper
To integrate a stepper into our form (sort of like this one from Material Design), the first thing we need to do is add it to the HTML just below the opening <form> tag.
<form id="jobApplicationForm">
  <div class="stepper">
    <span><span class="currentStep">1</span>/4</span>
  </div>
  <!-- ... -->
</form>
Next, we need to query the part of the stepper that will represent the current step. This is the span tag with the class name of currentStep.
const currentStepDiv = document.querySelector(".currentStep");
Now, we need to update the stepper value whenever the previous or next buttons are clicked. To do this, we need to update the showStep() function by appending the following line to it:
currentStepDiv.innerText = currentStep;
This line is added to the showStep() function because the showStep() function is responsible for navigating between steps and updating the currentStep variable. So, whenever the currentStep variable is updated, the currentStepDiv should also be updated to reflect that change.
Storing And Retrieving User Data
One major way we can improve the form’s user experience is by storing user data in the browser. Multistep forms are usually long and require users to enter a lot of information about themselves. Imagine a user filling out 95% of a form, then accidentally hitting the F5 button on their keyboard and losing all their progress. That would be a really bad experience for the user.
Using localStorage, we can store user information as soon as it is entered and retrieve it as soon as the DOM content is loaded, so users can always continue filling out their forms from wherever they left off. To add this feature to our forms, we can begin by saving the user’s information as soon as it is typed. This can be achieved using the input event.
Before adding the input event listener, get the form element from the DOM:
const form = document.getElementById("jobApplicationForm");
Now we can add the input event listener:
// Save data on each input event
form.addEventListener("input", () => {
  const formData = {
    name: document.getElementById("name").value,
    email: document.getElementById("email").value,
    phone: document.getElementById("phone").value,
    company: document.getElementById("company").value,
    jobTitle: document.getElementById("jobTitle").value,
    yearsExperience: document.getElementById("yearsExperience").value,
    skills: document.getElementById("skills").value,
    highestDegree: document.getElementById("highestDegree").value,
  };
  localStorage.setItem("formData", JSON.stringify(formData));
});
Next, we need to add some code to help us retrieve the user data once the DOM content is loaded.
window.addEventListener("DOMContentLoaded", () => {
  const savedData = JSON.parse(localStorage.getItem("formData"));
  if (savedData) {
    document.getElementById("name").value = savedData.name || "";
    document.getElementById("email").value = savedData.email || "";
    document.getElementById("phone").value = savedData.phone || "";
    document.getElementById("company").value = savedData.company || "";
    document.getElementById("jobTitle").value = savedData.jobTitle || "";
    document.getElementById("yearsExperience").value = savedData.yearsExperience || "";
    document.getElementById("skills").value = savedData.skills || "";
    document.getElementById("highestDegree").value = savedData.highestDegree || "";
  }
});
Lastly, it is good practice to remove data from localStorage as soon as it is no longer needed:
// Clear data on form submit
form.addEventListener('submit', () => {
  // Clear localStorage once the form is submitted
  localStorage.removeItem('formData');
});
Adding The Current Step Value To localStorage
If the user accidentally closes their browser, they should be able to return to wherever they left off. This means that the current step value also has to be saved in localStorage.
To save this value, append the following line to the showStep() function:
localStorage.setItem("storedStep", currentStep);
Now we can retrieve the current step value and return users to wherever they left off whenever the DOM content loads. Add the following code to the DOMContentLoaded handler to do so:
const storedStep = localStorage.getItem("storedStep");

if (storedStep) {
    const storedStepInt = parseInt(storedStep);
    steps.forEach((el, index) => {
      el.hidden = index + 1 !== storedStepInt;
    });
    currentStep = storedStepInt;
    currentStepDiv.innerText = currentStep;
  }
Also, do not forget to clear the current step value from localStorage when the form is submitted.
localStorage.removeItem("storedStep");
The above line should be added to the submit handler.
Wrapping Up
Creating multi-step forms can help improve user experience for complex data entry. By carefully planning out steps, implementing form validation at each step, and temporarily storing user data in the browser, you make it easier for users to complete long forms.
For the full implementation of this multi-step form, you can access the complete code on GitHub.
(gg, yk)

Cloud IDEs For Web Developers – Best Of
As more desktop-based tools and mobile productivity apps shift to the cloud, Cloud-based Integrated Development Environments (IDEs) have become essential for web developers. These cloud IDEs allow you to code, debug, and collaborate directly from your browser, providing a seamless experience for building websites and […]
CodingAs more desktop-based tools and mobile productivity apps shift to the cloud, Cloud-based Integrated Development Environments (IDEs) have become essential for web developers. These cloud IDEs allow you to code, debug, and collaborate directly from your browser, providing a seamless experience for building websites and web applications without the need for local setup.
Popular platforms like GitHub have made it easy to transition to cloud-based coding, and now full-featured Cloud IDEs are the preferred choice for many developers, especially those working in remote and collaborative settings.
In this list, you’ll find 10 of the best Cloud IDEs for web development, each offering unique features to streamline your coding workflow.
1. CodeSandbox

CodeSandbox is an excellent choice if you’re into front-end development, especially when you need to prototype quickly. It supports frameworks like React, Vue, and Angular, so it’s easy to start building right away. The intuitive interface makes it straightforward to work with multiple files, and you can see your changes live without a complicated setup.
CodeSandbox also integrates with GitHub, making it simple to pull in code or push changes to your repositories. It’s like having a collaborative code editor and deployment tool in one!
2. Replit
Replit is a versatile, beginner-friendly IDE that supports a wide range of programming languages. It’s designed for collaborative coding, making it ideal for group projects, learning to code, or sharing quick code snippets. Replit’s live multiplayer feature allows you to code in real time with others.
It also comes with an AI-powered assistant and various project templates, helping you get started quickly. Replit’s flexibility makes it a solid choice for developers at any stage, whether you’re just learning or working on full-fledged projects.
3. GitHub Codespaces
GitHub Codespaces takes the popular Visual Studio Code (VSCode) and brings it directly to the cloud. This means you get the full VSCode development experience with add-ons, themes, debugging, command palettes, and even terminal access, all right in your browser.
With Codespaces, you can launch a coding environment from any GitHub repository, making it incredibly convenient for working on projects without the need for local setup. It’s a game-changer for developers who want seamless transitions between devices.
4. StackBlitz
StackBlitz is a cloud IDE tailored for JavaScript and TypeScript development. It’s a fantastic choice if you’re working with frameworks like Angular, React, or Vue, as it’s optimized for them. StackBlitz enables you to start coding instantly with live previews of your work, giving you fast feedback.
One unique feature is offline support, so you can keep working even without an internet connection. It’s a powerful, quick, and reliable choice for front-end developers who want to streamline their workflow.
5. AWS Cloud9

AWS Cloud9 is Amazon’s cloud-based IDE that offers built-in support for over 40 programming languages. It’s especially valuable if you’re working with serverless applications or AWS services, as it includes a terminal for managing and deploying your cloud resources directly from the editor.
Ideal for both front-end and back-end development, AWS Cloud9 comes with collaborative features, so teams can code together in real-time. With a robust setup for building, running, and debugging code in the cloud, it’s perfect for developers focused on cloud-based applications.
6. Gitpod

Gitpod automates your dev environment setup, allowing you to start coding instantly by launching pre-configured workspaces. It integrates seamlessly with GitHub, GitLab, and Bitbucket, so you can dive into coding without spending time on setup.
You can customize each project environment using a `.gitpod.yml` file, making it easy to create and share consistent setups across teams. Gitpod’s automation and compatibility with popular repositories make it a great choice for teams and open-source contributors.
7. Glitch
Glitch is a unique cloud IDE focused on building and sharing full-stack apps. It’s popular for its collaborative and community-driven approach, allowing developers to quickly prototype and deploy apps in a fun, supportive environment.
With real-time previews and easy sharing options, Glitch is perfect for creative projects, hackathons, or learning web development. It’s especially well-suited for beginners or anyone looking for a more playful approach to building web applications.
8. Codeanywhere
Codeanywhere is a versatile cloud IDE that supports over 75 languages and frameworks, making it a go-to for developers working on diverse projects. It’s packed with features like SSH and FTP support, which means you can connect to remote servers and manage code in multiple environments.
Its various pricing options and flexible setup make Codeanywhere accessible for both solo developers and teams. With a mobile-friendly interface, you can even code on the go, giving you the freedom to work wherever you are.
9. PaizaCloud Cloud IDE

PaizaCloud is a straightforward, user-friendly cloud IDE that’s ideal for web and server development. Its drag-and-drop interface allows you to set up environments quickly with tools like MySQL, PostgreSQL, and more, so you can dive into coding with ease.
This IDE’s simplicity makes it great for beginners, while its support for multiple web technologies makes it versatile enough for experienced developers. PaizaCloud is perfect for anyone looking for a quick, no-fuss setup to build and test web applications.
10. Visual Studio Codespaces
Visual Studio Codespaces brings the power of Visual Studio to the cloud, offering a customizable coding experience that’s accessible from anywhere. With the same extensions, themes, and settings available in Visual Studio Code, it feels like working on a local machine.
Perfect for developers who want a seamless, cloud-based experience, Codespaces is scalable with adjustable resources, making it ideal for both personal and collaborative projects. It’s a powerful tool for anyone looking to code, collaborate, and debug without the need for extensive setup.
Visit Visual Studio Codespaces
The post Cloud IDEs For Web Developers – Best Of appeared first on Hongkiat.


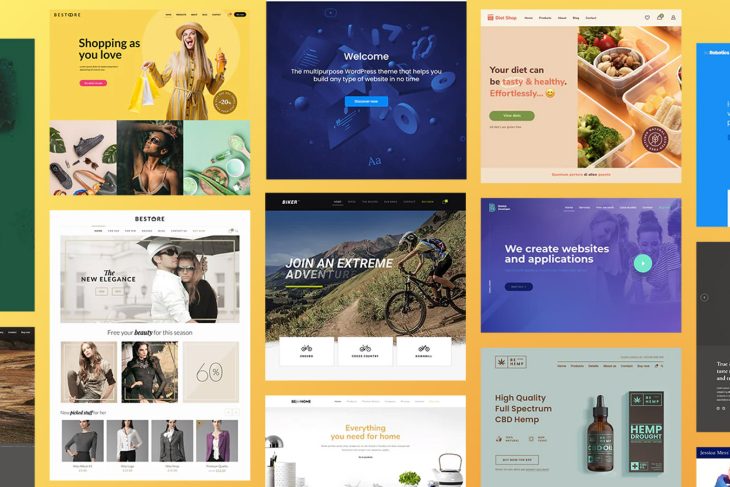
